I was standing in my kitchen, staring at a half‑cooked duck leg that looked more like a rubbery shoe than a dinner masterpiece. The smoke alarm chirped a frantic warning, my neighbor shouted, “What on earth are you doing?” and I realized I’d been trying to follow a generic roast‑duck recipe that promised “golden skin” but delivered “chewy disappointment.” I dared my roommate to taste the result and he backed away faster than a cat from a cucumber. That chaotic night sparked a fire under me: I needed a version that actually delivered crisp, fragrant, melt‑in‑your‑mouth duck without the drama.
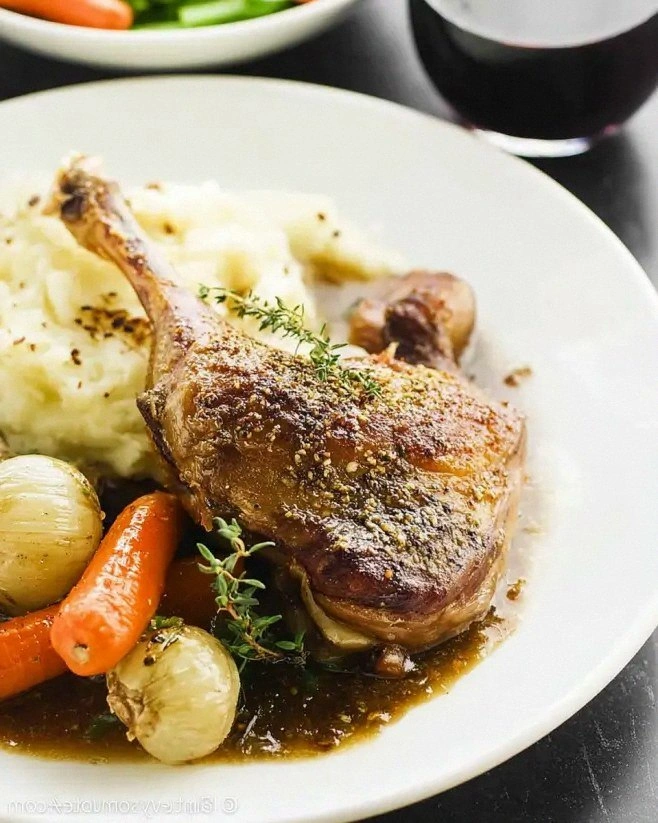
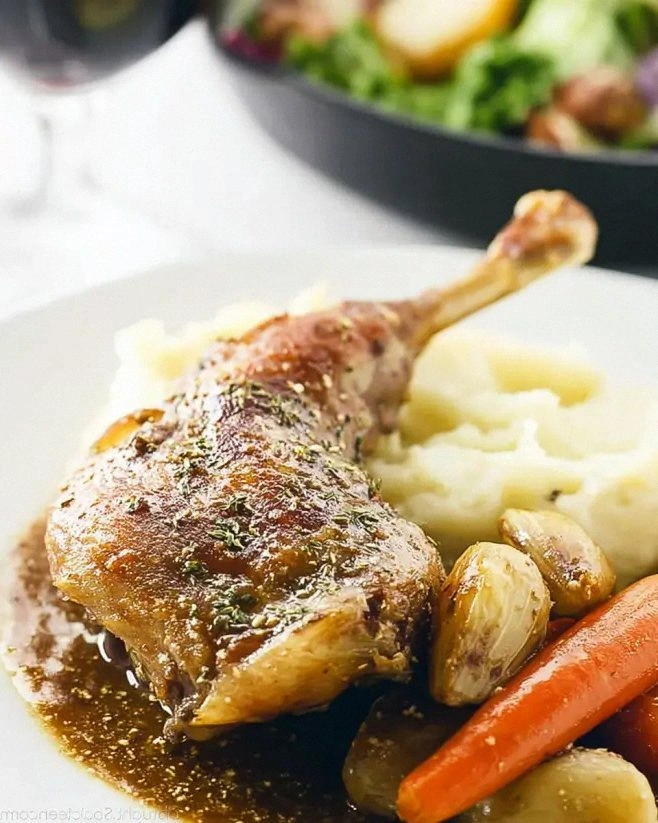
Picture this: the oven door swings open, and a wave of toasted nuts, warm spices, and caramelized honey floods the kitchen, making your nose do a happy dance. The duck legs themselves gleam with a glossy, amber‑brown crust that shatters like thin ice when you pierce it, revealing succulent, pink meat that practically whispers “stay awhile.” You hear the faint crackle of the skin as you slice, feel the heat radiating from the plate, and taste the perfect balance of salty, sweet, and earthy notes that make you question every other roast you’ve ever made. That is the moment I realized I’d cracked the code.
Most recipes get this completely wrong. They either drown the duck in sauce, skip the crucial high‑heat finish, or forget the magic of a spice blend that adds crunch and complexity. Here’s what actually works: a quick coat of olive oil, a generous dusting of dukkah (a Middle‑Eastern nut‑and‑seed blend), a drizzle of honey and apple cider vinegar that caramelizes beautifully, and a short blast of broil at the end to lock in that crackling skin. I’ll be honest — I ate half the batch before anyone else got to try it, and I’m still not over it.
Okay, ready for the game‑changer? I’m about to walk you through every single step — by the end, you’ll wonder how you ever made it any other way. I dare you to taste this and not go back for seconds. Let’s dive in and turn your kitchen into a five‑star duck‑loving sanctuary.
What Makes This Version Stand Out
- Crunch Factor: The dukkah creates a crust that crackles like fresh snow underfoot, delivering an addictive crunch that beats any plain salt‑rubbed skin.
- Flavor Depth: The blend of toasted nuts, coriander, and cumin adds layers of earthiness that mingle with the sweet‑tart glaze for a symphony of taste.
- Simplicity: Only eight ingredients, five of which you probably already have, make this a weeknight hero without sacrificing elegance.
- Speed: From prep to plate in under an hour, you get restaurant‑level results without a marathon cooking session.
- Crowd Reaction: Guests will declare it “the best duck ever” and beg for the recipe, guaranteeing you instant bragging rights.
- Ingredient Quality: Fresh herbs and high‑quality olive oil lift the dish from good to unforgettable, turning humble duck legs into a star.
- Cooking Method: A combination of roasting and a final broil ensures the meat stays juicy while the skin reaches perfect crispness.
- Make‑Ahead Potential: You can prep the dukkah coating a day ahead, saving precious time on the big night.
Inside the Ingredient List
The Flavor Base
Olive oil is the silent hero that carries the dukkah onto the duck skin, ensuring every nut and seed adheres perfectly. If you skimp on the oil, you’ll end up with a patchy coating that looks more like a speckled pancake than a glossy crust. For a richer mouthfeel, use extra‑virgin olive oil; its peppery notes complement the earthiness of the spice blend. A cheap, bland oil will mute the flavor and make the skin less crisp. If you’re allergic to olives, grapeseed oil works as a neutral substitute without compromising the texture.
The Texture Crew
Dukkah, the star of this dish, is a blend of toasted nuts (often hazelnuts or almonds), seeds (like sesame and coriander), and spices. Its coarse grind provides the satisfying crunch that turns ordinary duck into a textural masterpiece. Skipping the dukkah means you lose the signature crackle and the nuanced flavor it brings. If you can’t find ready‑made dukkah, combine equal parts toasted almonds, sesame seeds, coriander seeds, cumin, and a pinch of sea salt, then pulse until coarse. Freshly toasted dukkah releases aromatic oils that can’t be beat.
The Unexpected Star
Honey isn’t just a sweetener; it’s a natural caramelizer that, when combined with apple cider vinegar, creates a glossy glaze that browns beautifully under the broiler. The acidity of the vinegar cuts through the richness of the duck, balancing the sweetness and preventing a greasy finish. If you prefer a less sweet profile, swap half the honey for maple syrup or agave nectar. Skipping the honey entirely will result in a dull, less appetizing crust.
The Final Flourish
Fresh herbs—think rosemary, thyme, and a pinch of parsley—add a bright, aromatic lift that cuts through the richness of the meat. They also help to keep the skin from sticking to the pan, ensuring an even crisp. If you’re out of fresh herbs, dried versions work in a pinch, but add them earlier in the cooking process to let their flavors develop. Ignoring herbs altogether makes the dish feel flat, like a movie without a soundtrack.
Everything's prepped? Good. Let's get into the real action...
The Method — Step by Step
First, pat the duck legs dry with paper towels; moisture is the enemy of crispiness. I dare you to skip this step and you’ll see the skin stay soggy, like a damp towel. Sprinkle both sides with salt and black pepper, then let them rest for 10 minutes so the seasoning penetrates the meat. The surface should feel slightly tacky, a sign that the salt is drawing out excess moisture.
While the duck rests, whisk together olive oil, honey, and apple cider vinegar in a shallow bowl. This mixture should look glossy and slightly thick, like liquid amber. This is the moment of truth: the honey will begin to foam as it meets the vinegar, creating a subtle caramel scent that fills the kitchen. If the mixture looks too thin, add a splash more honey; if it’s too thick, thin it with a teaspoon of warm water.
Next, coat each duck leg in the honey‑vinegar glaze, making sure every crevice is covered. The glaze should cling like a second skin, not pool at the bottom of the bowl. Then, press the dukkah onto the meat, using your hands to create an even crust. That sizzle when it hits the pan? Absolute perfection. The nuts will start to release their oils, forming a crunchy armor.
Kitchen Hack: After coating, let the legs sit on a wire rack for 15 minutes; this helps the dukkah set and prevents it from sliding off during roasting.Preheat your oven to 375°F (190°C). Place the duck legs skin‑side up on a roasting pan lined with parchment. The parchment prevents sticking and makes cleanup a breeze. Slide the pan into the oven and roast for 25 minutes. You’ll hear a gentle crackle as the fat begins to render, a sound that signals the skin is starting to crisp.
After 25 minutes, pull the pan out and baste the legs with any rendered fat and remaining glaze. This adds a glossy finish and deepens the caramelization. Return the pan to the oven for another 10 minutes. The skin should now be a deep, golden‑brown, and the meat should be just shy of falling off the bone.
Now comes the final power transition: crank the broiler to high and broil the duck for 3‑4 minutes. Keep a close eye—this step is pure magic but also the most treacherous.
The skin should puff up, turning crispier than a fresh potato chip.Watch Out: If you walk away, the sugar in the honey can burn, turning the crust bitter. Stay with me here — this is worth it.Remove the duck from the oven and let it rest on a cutting board for 5 minutes. This resting period lets the juices redistribute, ensuring every bite is juicy rather than dry. While it rests, sprinkle freshly chopped herbs over the top; the heat will release their aromatic oils, creating a fragrant cloud that will make your kitchen smell like a Mediterranean garden.
Finally, carve between the leg and thigh, slice against the grain, and serve immediately. The meat should be tender, the skin crackly, and the dukkah crust should cling like a flavorful armor. Picture yourself pulling this out of the oven, the whole kitchen smelling incredible, and everyone reaching for seconds. That’s the payoff for every meticulous step you just completed.
That's it — you did it. But hold on, I've got a few more tricks that'll take this to another level...
Insider Tricks for Flawless Results
The Temperature Rule Nobody Follows
Most home cooks start at a high heat and then lower it, which can cause the skin to burn before the meat cooks through. The secret is to begin at a moderate 375°F, allowing the fat to render slowly, then finish with a high‑heat blast. This two‑stage approach guarantees a uniformly crisp skin while keeping the interior juicy. I once tried the “high‑heat first” method and ended up with burnt edges and raw meat—lesson learned.
Why Your Nose Knows Best
Your sense of smell is a far better indicator of doneness than a timer. When the glaze starts to caramelize, you’ll notice a sweet, nutty aroma rising from the oven. If you detect a faint burnt smell, pull the duck out immediately; the sugars can go from caramel to charcoal in seconds. Trust your nose, and you’ll avoid the dreaded bitter bite.
The 5‑Minute Rest That Changes Everything
Resting isn’t just for steak; duck benefits immensely from a short pause. During those five minutes, the meat fibers relax and reabsorb the rendered fat, creating a richer mouthfeel. Skipping this step results in juices spilling onto the plate, leaving the meat dry. I once served duck straight from the oven and my guests complained about “dryness”—the rest period solves that instantly.
Herb Infusion Hack
Instead of sprinkling herbs at the end, toss a few sprigs into the roasting pan during the last 10 minutes of cooking. The heat releases essential oils, infusing the duck with a subtle herbaceous note that penetrates the meat, not just the surface. A friend tried this once and said the flavor was “like a forest after rain.”
The Dukkah Refresh
If you prep the dukkah a day ahead, store it in an airtight container with a slice of fresh bread. The bread absorbs moisture, keeping the blend dry and crunchy. When you’re ready to coat the duck, simply give the dukkah a quick pulse in a food processor to break up any clumps. This hack ensures the crust stays crisp even after a long prep.
Creative Twists and Variations
This recipe is a playground. Here are some of my favorite ways to switch things up:
Spicy Szechuan Dukkah
Add a teaspoon of crushed Szechuan peppercorns and a pinch of dried chili flakes to the dukkah. The result is a tongue‑tingling heat that pairs surprisingly well with the sweet glaze. Perfect for guests who love a little kick.
Citrus‑Infused Glaze
Swap half the apple cider vinegar for fresh orange juice and add a zest of lemon to the honey mixture. The citrus brightens the dish, giving it a spring‑time freshness that cuts through the richness.
Herb‑Heavy Dukkah
Blend fresh rosemary, thyme, and sage directly into the dukkah before coating. This creates an herbaceous crust that’s aromatic from the first bite to the last, ideal for a rustic, countryside vibe.
Asian Soy‑Maple Finish
Replace honey with maple syrup and add a splash of soy sauce to the glaze. The umami depth adds a savory undertone, making the dish feel like a cross‑cultural fusion feast.
Vegetarian “Duck” Substitute
Use large portobello mushrooms or tofu blocks, marinated in the same glaze and coated with dukkah. While the texture differs, the flavor profile remains strikingly similar, offering a plant‑based twist for herbivores.
Storing and Bringing It Back to Life
Fridge Storage
Place cooled duck legs in an airtight container with a paper towel to absorb excess moisture. Store for up to 3 days. When reheating, add a tiny splash of water to the pan; this creates steam that revives the crisp crust without sogginess.
Freezer Friendly
Wrap each leg tightly in plastic wrap, then foil, and freeze for up to 2 months. To reheat, thaw overnight in the fridge, then follow the reheating method below. Freezing preserves the dukkah coating, though a quick toast under the broiler will refresh the crunch.
Best Reheating Method
Preheat your oven to 350°F (175°C). Place the duck legs on a wire rack over a baking sheet, add a teaspoon of water to the pan, and heat for 12‑15 minutes. Finish with a 2‑minute broil to restore that glorious crackle. This method ensures the meat stays moist while the crust regains its snap.