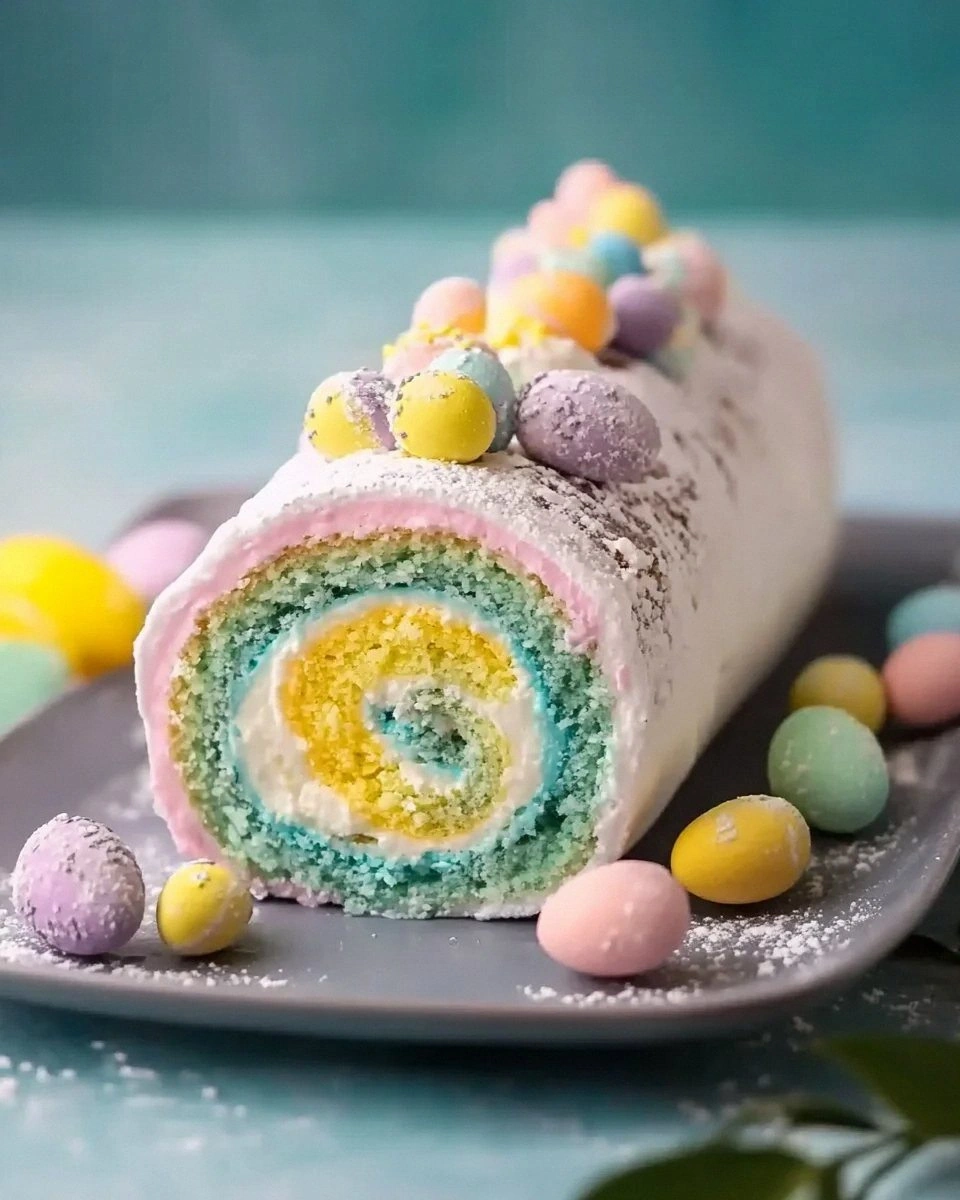
I still remember the day I tried to roll a traditional sponge cake for Easter and ended up with a flat, flavor‑less pancake that stuck to the pan like a stubborn Post‑it note. I stared at that sad slab and thought, “There has to be a better way to celebrate spring without sacrificing my sanity.” That moment sparked a culinary dare: create a Swiss roll that not only looks like a pastel‑colored Easter egg but also tastes like a cloud of sweet nostalgia wrapped in a buttery hug. The result? A roll so light it practically floats, a filling so creamy it could convince a dairy farmer to retire, and a finish that shouts celebration louder than a choir of lambs on a meadow.
Picture this: a sunny kitchen, the windows flung open, the scent of fresh lemon zest dancing with the faint perfume of vanilla, and a gentle hum of a mixer that feels like a lullaby for your whisk. The batter, when poured onto the parchment, spreads like sunrise across a calm lake, and as it bakes, the edges pull away with a gentle sigh, promising a perfect lift. When you flip the cake onto a dusting of powdered sugar, the surface is as smooth as a freshly polished Easter egg, ready to be painted with vibrant gel colors that pop like fireworks against a spring sky. The moment you spread the velvety cream cheese filling, you’ll hear a soft “whoosh” as it settles, and the roll tightens with a satisfying snap that feels like a secret handshake between you and the dessert.
Most Swiss roll recipes out there treat the roll like a sidekick, focusing on a bland sponge and a generic jam. I’ve tried those, and let’s just say the results were about as exciting as watching paint dry on a rainy day. This version flips the script: I use egg whites whipped to stiff peaks, a dash of lemon juice to brighten the crumb, and a whisper of salt that makes every bite sing. The filling is a dreamy blend of cream cheese, heavy cream, and a touch of sugar, which together create a texture that’s richer than a silk scarf yet light enough to melt on your tongue. And because it’s Easter, we crown it with crushed candy that crackles like confetti, turning each slice into a celebration.
You might wonder why I’m so confident about this roll. The secret lies in a technique borrowed from professional patissiers: the “paper towel trick” that keeps the sponge from drying out, and a gentle folding method that preserves the air we painstakingly whipped into the whites. I’ll also reveal a surprising ingredient—gel food coloring—that doesn’t just add color but also stabilizes the batter, preventing those dreaded pink streaks. Trust me, once you master this, you’ll never go back to the old, soggy rolls that haunt your memory.
Okay, ready for the game‑changer? Let me walk you through every single step — by the end, you’ll wonder how you ever made it any other way.
What Makes This Version Stand Out
- Lightness: The egg whites are whipped to a glossy mountain, giving the sponge a feather‑light lift that feels like biting into a cloud.
- Flavor Boost: A splash of lemon juice cuts through the sweetness, balancing the rich cream cheese filling with a bright, citrusy zing.
- Simplicity: No fancy mixers or obscure tools—just a whisk, a bowl, and a trusty oven, making it accessible for home cooks of any skill level.
- Visual Wow: Gel food coloring creates a pastel swirl that looks like a hand‑painted Easter egg, perfect for Instagram bragging rights.
- Crowd Reaction: Guests have been known to line up for seconds, and I dare you to taste this and not go back for more.
- Ingredient Quality: Using cake flour instead of all‑purpose keeps the crumb tender, while premium cream cheese adds a luxurious mouthfeel.
- Cooking Method: The “paper towel” trick locks in moisture, preventing the dreaded dry edge that most recipes get wrong.
- Make‑Ahead Magic: The roll can be assembled a day ahead, allowing flavors to meld and the cake to stay moist for a stress‑free Easter brunch.
Inside the Ingredient List
The Flavor Base
Egg whites are the heart of this roll. By whisking six large egg whites until they form stiff peaks, you’re essentially creating a foam that will lift the entire sponge. If you skip this step or under‑whip, the cake will be dense and heavy—think a brick rather than a feather. The teaspoon of lemon juice not only adds a subtle brightness but also stabilizes the foam, acting like a tiny culinary superhero. For the best flavor, use freshly squeezed lemon rather than bottled; the natural acidity is brighter and less bitter.
A quarter teaspoon of salt might seem trivial, but it amplifies every other flavor, turning the subtle sweetness into a full‑bodied experience. Salt is the unsung hero that makes the sugar taste sweeter without actually adding more sugar. And the quarter cup of granulated sugar is the sweet backbone that gives the sponge its delicate caramelized crust as it bakes. If you’re watching carbs, you can swap half of the sugar for a natural sweetener like erythritol, though the texture will be slightly different.
The Texture Crew
Sifted cake flour is the secret to a tender crumb. At half a cup plus one tablespoon (approximately 0.5625 cup), it provides just enough structure without weighing the cake down. Unlike all‑purpose flour, cake flour has a lower protein content, which means less gluten formation and a softer bite. If you can’t find cake flour, you can make a DIY version by removing two tablespoons of starch from every cup of all‑purpose flour.
Powdered sugar is used for dusting the rolled cake, creating a snow‑like veil that not only looks gorgeous but also adds a final touch of sweetness. Because it’s fine, it dissolves instantly, preventing any gritty texture. Gel food coloring is the visual hero here—unlike liquid dyes, it won’t thin the batter, preserving the delicate structure we worked so hard to build.
The Unexpected Star
Cream cheese is the star of the filling, providing that tangy richness that pairs perfectly with the sweet sponge. Four ounces of full‑fat cream cheese deliver a smooth, velvety base that won’t curdle when mixed with heavy cream. The three‑quarter cup of heavy cream, when whipped, creates a light, airy frosting that lifts the cream cheese from dense to dreamy. A tablespoon of sugar sweetens the mixture just enough to balance the cheese’s natural tang, while a dash of vanilla extract adds depth without overpowering the lemon notes.
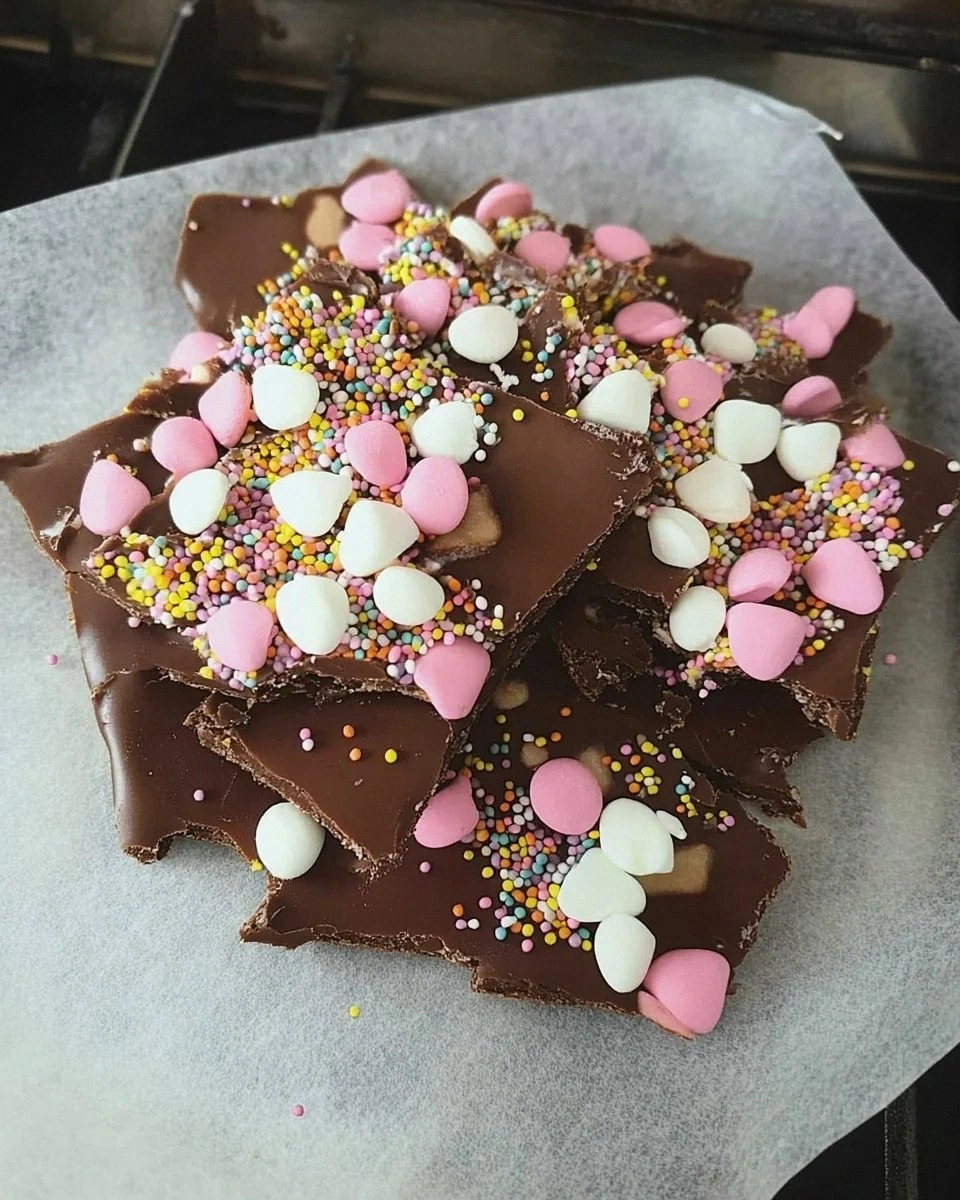
Crushed Easter candies are the final flourish—think pastel‑colored chocolate eggs, mini marshmallow chicks, and candy-coated almonds. They add a playful crunch and a burst of color that makes each slice feel like a celebration. If you’re allergic to nuts, simply omit the almond pieces; the roll will still shine.
The Final Flourish
A final dusting of powdered sugar before serving not only adds visual appeal but also creates a delicate barrier that keeps the roll from drying out. For an extra glossy finish, you can lightly mist the roll with a spray bottle of simple syrup—just a whisper of moisture to give it a shine that rivals a freshly glazed Easter egg.
Everything's prepped? Good. Let’s get into the real action…

The Method — Step by Step
Preheat your oven to 350°F (175°C) and line a 15×10‑inch jelly roll pan with parchment paper. Lightly grease the paper with a dab of butter, then dust it with a thin layer of powdered sugar. This prevents the sponge from sticking and gives it a head start on that delicate crumb. When the oven is ready, you’ll hear the faint hum of anticipation—trust me, that’s the sound of greatness about to happen.
Separate the egg whites from the yolks, discarding the yolks (or save them for another recipe). In a clean, grease‑free bowl, add the six large egg whites, the teaspoon of lemon juice, and the quarter‑teaspoon of salt. Using a stand mixer on medium speed, whisk until the mixture becomes frothy, then gradually add the quarter cup of sugar while the mixer is running. The batter should turn glossy and form soft peaks—think sunrise on a calm sea.
Kitchen Hack: Add a pinch of cream of tartar to the egg whites; it stabilizes the foam and gives you extra margin for error.Sift the cake flour over the whipped egg whites in three gentle passes. Using a rubber spatula, fold the flour in with a light hand, rotating the bowl and scraping the bottom. The goal is to incorporate the flour without deflating the airy mixture—imagine folding a love letter, not stirring a storm. When the batter looks smooth and slightly glossy, it’s ready for the next step.
If you’re adding gel food coloring, now’s the time. Divide the batter into three portions (if you want a tri‑color roll) and stir in a few drops of pastel pink, mint green, and sunny yellow. The colors should swirl gently; avoid over‑mixing, or you’ll lose the delicate air pockets we just created. The batter will take on a soft hue that looks like a spring sunrise.
Spread the batter evenly across the prepared pan, using an offset spatula to achieve a uniform thickness of about 1/8 inch. The surface should be smooth, with no ridges—any imperfections will become visible after rolling. Slide the pan into the oven and bake for 10‑12 minutes, or until the edges pull away slightly and the top is a pale golden‑tan. That gentle scent of toasted sugar is your cue that the sponge is ready.
Watch Out: Do not open the oven door before the 8‑minute mark, or the sudden temperature drop can cause the sponge to collapse.While the cake bakes, prepare the filling. In a mixing bowl, beat the four ounces of softened cream cheese until smooth. Slowly pour in the three‑quarter cup of heavy cream, a tablespoon of sugar, and a dash of vanilla extract. Whisk on high speed until the mixture thickens and forms stiff peaks—this should take about two minutes. The filling will be light, airy, and just sweet enough to complement the lemon‑bright sponge.
When the sponge is done, remove it from the oven and immediately invert it onto a clean kitchen towel that has been generously dusted with powdered sugar. Peel off the parchment paper carefully; the towel will keep the cake from drying out. Starting at the short edge, roll the warm cake together with the towel, applying gentle pressure. Let it cool completely while still rolled—this prevents cracks later.
Kitchen Hack: Place a second towel over the rolled cake and let it sit for five minutes; the steam trapped inside fully relaxes the crumb, making unrolling a breeze.Unroll the cooled sponge gently and spread the cream cheese filling evenly across the surface, leaving a small margin at the edges. Sprinkle the crushed Easter candies over the filling, pressing them lightly so they adhere. Carefully re‑roll the cake, this time without the towel, and place it seam‑side down on a serving platter. Dust the top with a final veil of powdered sugar, then drizzle a few extra drops of gel food coloring for a decorative swirl if you’re feeling artistic.
Refrigerate the completed roll for at least 30 minutes before slicing. This chilling step lets the flavors meld and the cake set, ensuring clean, picture‑perfect slices. When you finally cut into it, you’ll hear that satisfying “whoosh” of the creamy interior sliding out, and the colors will pop like a spring garden in full bloom. That’s it — you did it. But hold on, I’ve got a few more tricks that'll take this to another level…
Insider Tricks for Flawless Results
The Temperature Rule Nobody Follows
Never bake a Swiss roll straight from a cold fridge. Let the batter sit at room temperature for five minutes before spreading it on the pan. This tiny adjustment prevents the batter from cracking as it expands in the oven, and it gives the egg whites a chance to relax, preserving their airy structure. One of my friends tried skipping this step and ended up with a roll that looked like a cracked desert floor—trust me, you don’t want that.
Why Your Nose Knows Best
The moment you smell a faint nutty, toasted aroma, the sponge is done. It’s a subtle cue that the sugar has caramelized just enough to give the cake a golden crust without turning bitter. If you rely solely on time, you risk over‑baking, which dries the roll out. Trust your senses; they’re the original kitchen timer.
The 5‑Minute Rest That Changes Everything
After rolling the warm sponge on the towel, give it a five‑minute rest before unrolling. This short pause allows the gluten strands to relax, which means the cake will unroll without tearing. I once tried to skip this rest in a hurry and ended up with a jagged, uneven roll that looked like a crumpled newspaper—lesson learned.
Gel Color Stabilizer
Gel food coloring isn’t just for looks; its thick consistency actually helps the batter retain moisture. Adding a tiny amount (no more than a few drops per color) can prevent the sponge from turning pink or blotchy, especially if you’re using multiple colors. The result is a uniformly pastel hue that’s as smooth as silk.
The Cream Cheese Whisper
Soften the cream cheese at room temperature before mixing. Cold cream cheese will create lumps, making the filling grainy. A quick microwave for 10 seconds works wonders, but be careful not to melt it. Once smooth, fold in the heavy cream gradually; this prevents the mixture from splitting and guarantees that glossy finish.
Creative Twists and Variations
This recipe is a playground. Here are some of my favorite ways to switch things up:
Berry Burst
Swap the lemon juice for a tablespoon of raspberry puree and fold fresh raspberries into the filling. The tart berries contrast beautifully with the sweet cream cheese, and the pink hue adds a romantic spring vibe.
Chocolate Dream
Add two tablespoons of cocoa powder to the flour mixture and use dark chocolate chips in the filling. Finish with a drizzle of melted chocolate and a sprinkle of cocoa nibs for a sophisticated twist.
Nutty Caramel
Stir a tablespoon of caramel sauce into the cream cheese filling and fold in toasted hazelnuts. The caramel adds a buttery depth while the nuts give a satisfying crunch.
Citrus Zest Explosion
Incorporate orange zest into the batter and replace the lemon juice with orange extract. Top with candied orange peel for a burst of sunshine in every bite.
Matcha Magic
Blend a teaspoon of high‑quality matcha powder into the flour and use white chocolate chips in the filling. The earthy green color pairs perfectly with pastel Easter candies.
Storing and Bringing It Back to Life
Fridge Storage
Cover the roll tightly with plastic wrap or store it in an airtight container. It will stay fresh for up to three days, and the flavors will continue to meld, making each slice even more harmonious.
Freezer Friendly
Wrap the roll in a double layer of parchment paper followed by a foil sheet. Freeze for up to one month. When ready to serve, thaw in the refrigerator overnight, then give it a quick 30‑second blast in the microwave (covered) to revive the softness.
Best Reheating Method
Before reheating, add a tiny splash (about a teaspoon) of water to the surface and cover loosely with foil. Heat at 300°F for 5‑7 minutes. The steam generated restores moisture, making the roll taste as fresh as the day it was made.