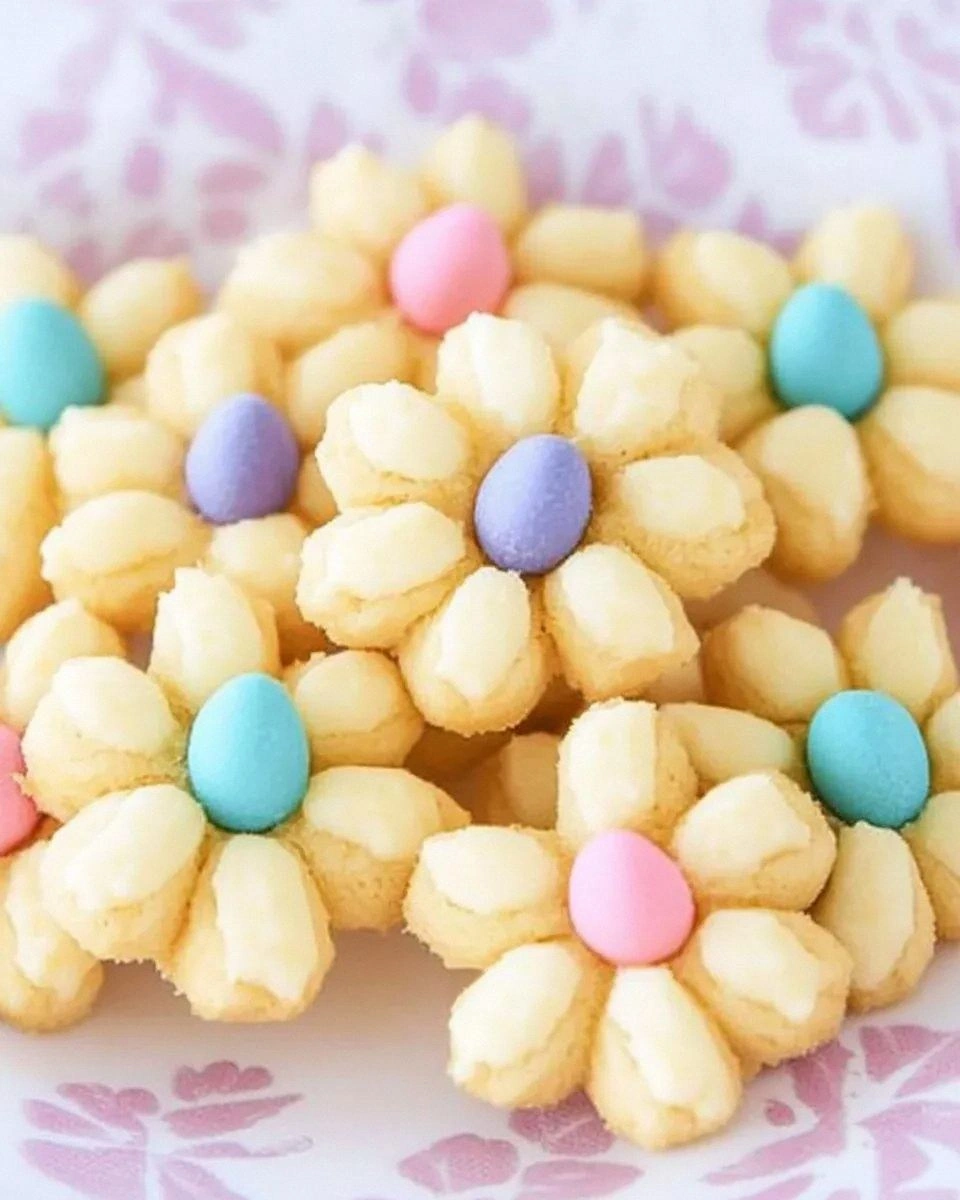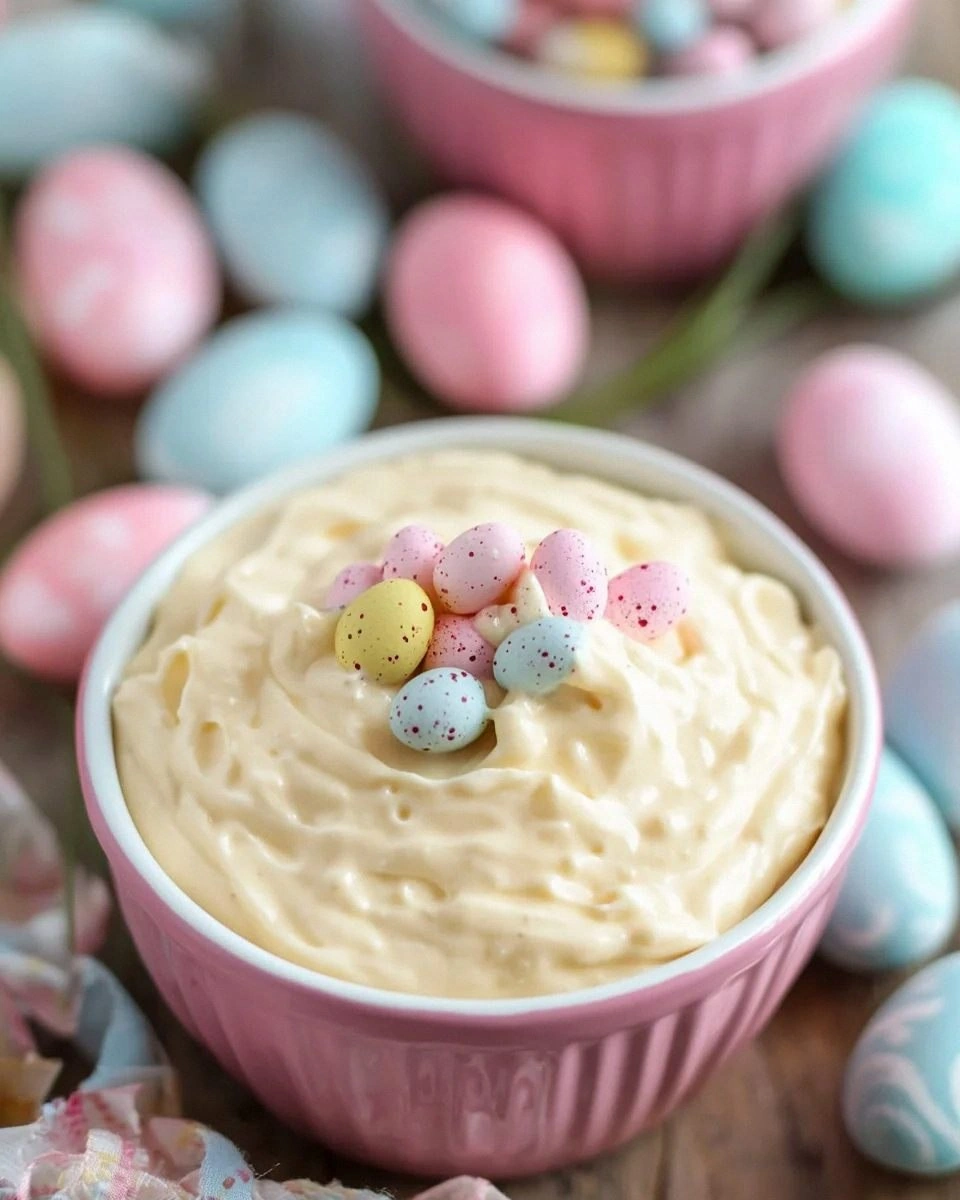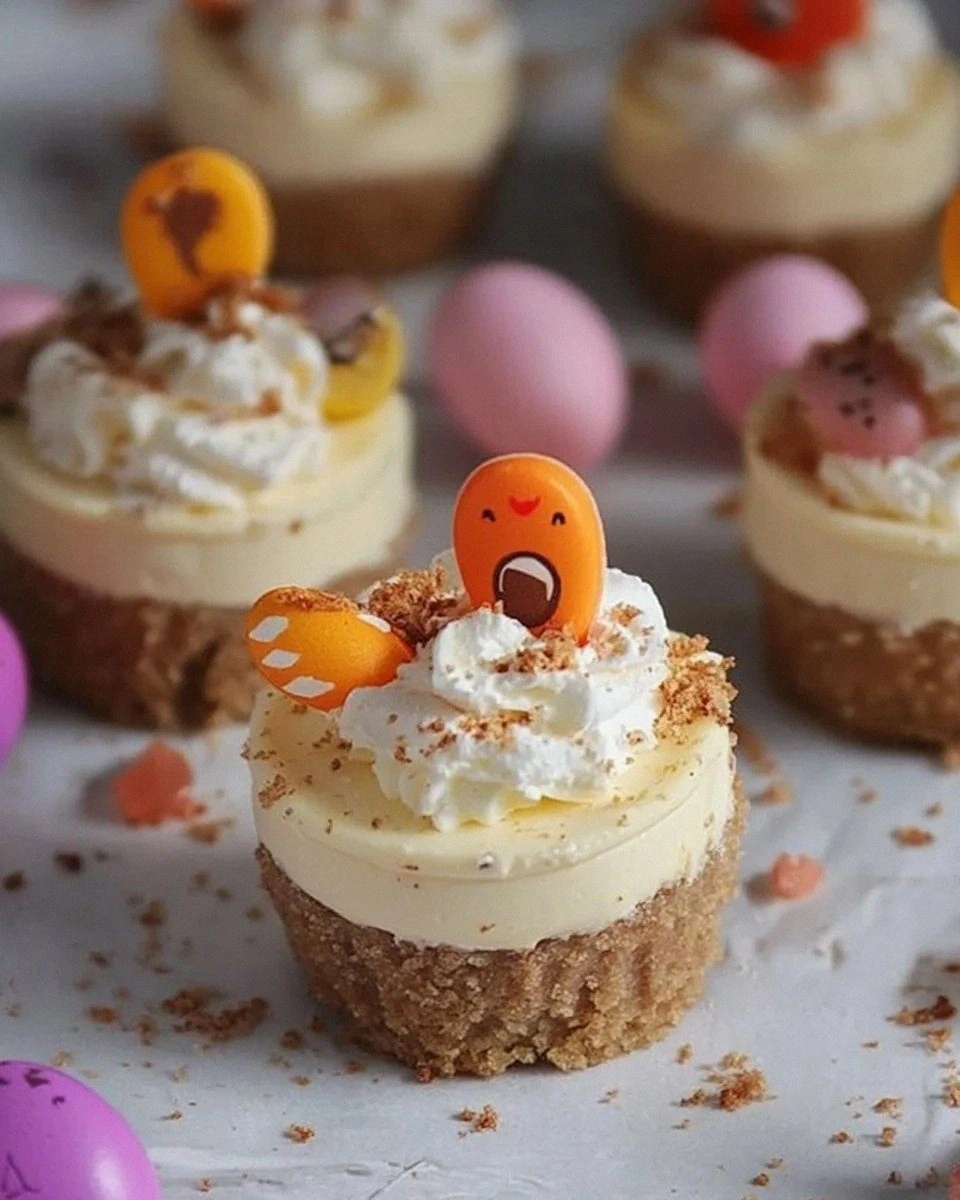
Picture this: I’m in my kitchen on a rainy Saturday, the kind of day when the clouds look like they’re trying to smother the world, and I’ve just ruined a batch of classic cheesecake by over‑mixing the filling. The texture turned into a rubbery nightmare that no amount of whipped cream could rescue. I stared at the disaster, sighed, and then a mischievous voice inside me whispered, “What if we made it bite‑size, spring‑themed, and totally foolproof?” That tiny dare sparked a culinary adventure that led to the birth of these Mini Easter Cheesecakes, the kind of treat that makes you forget the soggy weather outside and focus on the sweet, buttery scent swirling around the oven.
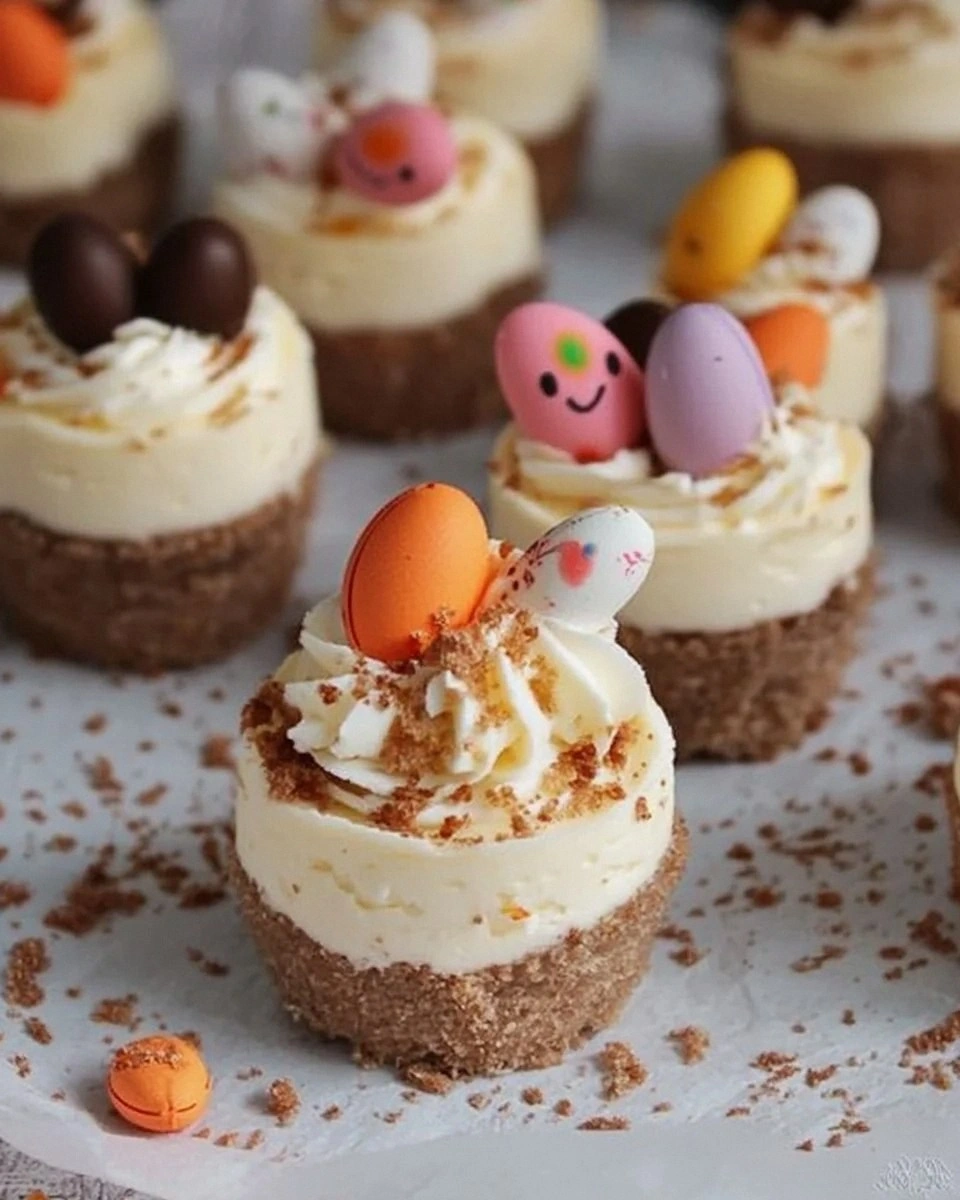
From the moment I lifted the first mini cheesecake out of the tin, a wave of buttery, vanilla‑kissed aroma hit my nose like a spring breeze through a field of blooming lilacs. The crust crackled softly as I tapped it, releasing a faint, nutty perfume that reminded me of a fresh‑baked biscuit shop on a bustling market street. When I took a bite, the silky cream cheese filling melted like sunrise on a pond, while the hidden shards of Easter chocolate added a surprising snap that sang a little chorus of “yum!” in every mouthful. The texture was a perfect marriage of crumbly base, airy filling, and a glossy chocolate topping that glistened like dew‑kissed petals.
What makes this version the ultimate spring treat? It’s not just the flavors—though the balance of sweet, buttery, and chocolatey is spot‑on—but the fact that it’s engineered for consistency, speed, and that Instagram‑worthy finish. Most recipes either overcomplicate the crust, demand a water bath that feels like a science experiment, or leave you with a filling that’s too dense. I’ve stripped away the fluff, kept the essential steps, and added a secret ingredient that gives the filling a cloud‑like lightness without sacrificing that rich, indulgent taste. Trust me, this is hands down the best version you’ll ever make at home.
And here’s a little teaser: I’m about to reveal a technique involving a double‑cream fold that most bakers overlook, which turns the ordinary cheesecake into a melt‑in‑your‑mouth marvel. I dare you to taste this and not go back for seconds. Let me walk you through every single step — by the end, you’ll wonder how you ever made it any other way.
What Makes This Version Stand Out
- Flavor Harmony: The subtle vanilla notes in the filling dance with the rich, slightly bitter Easter chocolate, creating a balanced flavor profile that feels both festive and sophisticated.
- Texture Triple Threat: A buttery biscuit crust, a light, airy cream cheese core, and a glossy chocolate topping give you three distinct textures in one perfect bite.
- Simplicity Meets Elegance: No water bath, no fancy molds—just a standard muffin tin, a few everyday pantry items, and a dash of patience.
- Unique Ingredient Twist: Using both cream cheese and mascarpone (or an optional blend) adds depth and a silk‑smooth finish that ordinary cheesecakes lack.
- Crowd‑Pleaser Factor: These mini treats disappear faster than spring flowers in a rainstorm; they’re perfect for Easter brunches, baby showers, or any gathering that needs a pop of color.
- Ingredient Quality: High‑fat dairy and premium Easter chocolates ensure a luxurious mouthfeel without feeling heavy.
- Cooking Method Magic: Baking at a moderate temperature prevents cracking and keeps the centers perfectly creamy.
- Make‑Ahead Potential: You can prep the crust a day ahead and store the filled cheesecakes refrigerated for up to 48 hours, making party planning a breeze.
Inside the Ingredient List
The Flavor Base
The star of the show is the full‑fat cream cheese or mascarpone. Its high fat content provides that luxurious, velvety mouthfeel that low‑fat alternatives simply can’t match. If you skip this and use a reduced‑fat version, expect a firmer, less creamy texture that feels more like a custard than a cheesecake. For an extra depth of flavor, I like to blend half cream cheese with half mascarpone – the mascarpone adds a subtle buttery note that elevates the whole bite.
The Texture Crew
Our crust relies on digestive biscuits and unsalted butter. The biscuits bring a sweet, slightly caramelized crunch, while the butter binds everything together, creating a buttery base that holds its shape. If you’re gluten‑free, swap the biscuits for gluten‑free graham crackers; just make sure they’re finely crushed. And a pro tip: melt the butter slowly over low heat to avoid scorching, which would give a bitter aftertaste.
The Unexpected Star
Enter the crushed Easter chocolates. These colorful morsels not only add a festive visual pop but also a surprise snap that contrasts the creamy filling. Using high‑quality chocolate ensures a glossy finish and a melt‑in‑the‑mouth richness. If you’re a fan of dark chocolate, go for 70% cocoa; for a sweeter profile, milk chocolate works beautifully.
The Final Flourish
We finish with a drizzle of double cream mixed with a touch of icing sugar and a sprinkle of sprinkles or grated chocolate. This glossy topping not only adds visual appeal but also a buttery richness that rounds out the flavor. If you’re watching sugar, reduce the icing sugar by half – the natural sweetness of the chocolate will still shine through.
Everything's prepped? Good. Let's get into the real action...
The Method — Step by Step
Preheat your oven to 160°C (320°F). While the oven warms up, line a standard 12‑cup muffin tin with paper liners. This temperature is low enough to keep the cheesecake from cracking, yet hot enough to set the crust nicely. I always place a baking sheet on the lower rack to catch any drips – the kitchen stays tidy, and you won’t have to scramble for a mop later.
Crush the digestive biscuits into fine crumbs using a food processor or a sealed bag and rolling pin. Pro tip: add a pinch of sea salt to the crumbs – it amplifies the buttery flavor. Melt the unsalted butter in a small saucepan over low heat, then pour it over the crumbs and stir until every particle shines.
Kitchen Hack: Press the crumb‑butter mixture into the muffin cups with the back of a spoon, then chill for 10 minutes. A chilled crust stays firm when the filling is added.While the crust chills, whisk together the full‑fat cream cheese (or mascarpone) and 50 g icing sugar until smooth. The mixture should be free of lumps – think of a cloud that you could float on. Add the vanilla extract and keep whisking; the vanilla is the secret that ties the chocolate and biscuit flavors together. If the mixture looks too thick, splash in a tablespoon of the 150 ml double cream to loosen it without thinning the texture.
In a separate bowl, whip the remaining 150 ml double cream until soft peaks form. This is where the magic happens: folding the whipped cream into the cheese mixture creates a lighter, airy filling that feels like a mousse rather than a dense cake. Gently fold using a spatula, turning the bowl over and over – the goal is to keep as much air as possible.
Stir in the crushed Easter chocolates, reserving a handful for garnish later. The chocolate pieces should be evenly distributed, giving each bite a surprise snap. If you prefer a smoother texture, pulse the chocolate a few times in the processor, but I love the rustic look of larger shards.
Kitchen Hack: Toss the chocolate pieces in a teaspoon of melted butter before folding – they’ll stay glossy and won’t melt into the filling.Pour the filling into the chilled crusts, filling each cup about three‑quarters full. Watch Out: Over‑filling can cause the cheesecake to rise and crack during baking. Gently tap the tin on the counter to release any air bubbles – you’ll hear a faint pop that signals a smooth surface.
Place the muffin tin in the oven and bake for 25‑30 minutes. The edges should look set and start to pull away from the sides of the cups, while the centre will still have a slight wobble – that’s the perfect sign of a custardy interior. Resist the urge to open the oven door early; the gentle heat needs to stay constant.
While the cheesecakes bake, whip the remaining 125 ml double cream with 1 tbsp icing sugar until stiff peaks form. This topping will be spread on the cooled cheesecakes for a silky finish. If you’re short on time, you can skip the whipped topping and simply drizzle melted chocolate, but the whipped cream adds a luxurious contrast.
When the cheesecakes are done, turn off the oven, crack the door open, and let them sit for 10 minutes – this gradual cooling prevents cracks. Then transfer the tin to a wire rack and let the mini cheesecakes cool completely before refrigerating for at least 2 hours. Once chilled, pipe or spoon the whipped cream on top, garnish with the reserved chocolate shards, sprinkles, or grated chocolate, and admire the spring‑time masterpiece you’ve created.
That's it — you did it. But hold on, I've got a few more tricks that'll take this to another level...
Insider Tricks for Flawless Results
The Temperature Rule Nobody Follows
Never bake cheesecake batter straight from the fridge. Let it sit at room temperature for 20 minutes before pouring it into the crust. This small step ensures the batter bakes evenly, preventing the dreaded cracked top. I once tried to skip this and ended up with a cheesecake that looked like a cracked desert floor – not pretty.
Why Your Nose Knows Best
When the edges of the cheesecake start to turn a light golden brown and you can smell a faint buttery aroma, the interior is nearly set. Trust that scent; it’s a reliable cue that the center will still be creamy once it cools. I’ve learned to stop counting minutes and start listening to my kitchen.
The 5‑Minute Rest That Changes Everything
After you pull the cheesecakes from the oven, let them rest inside the turned‑off oven for exactly five minutes with the door ajar. This gentle residual heat finishes the cooking process without shocking the batter, which can cause cracks. It’s a tiny pause that makes a massive difference in texture.
Whipped Cream Whisper
When whipping the cream for the topping, add a pinch of cream of tartar. It stabilizes the foam, giving you stiff peaks that hold up longer, even if the cheesecakes sit out for a while at a brunch. One of my friends tried without it and ended up with a soupy topping – a lesson learned the hard way.
Chocolate Glaze Perfection
If you opt for a chocolate drizzle instead of whipped cream, melt the chocolate over a double boiler and add a splash of the reserved double cream. This creates a glossy, pourable glaze that sets with a snap. Remember to let it cool just a touch before drizzling, or you’ll melt the delicate crust.
Creative Twists and Variations
This recipe is a playground. Here are some of my favorite ways to switch things up:
Berry Burst
Swap the Easter chocolate for a mixed berry compote (raspberry, strawberry, and blueberry). Swirl the compote into the filling before baking for a tangy contrast. The bright colors look gorgeous against the pale cheesecake.
Nutty Delight
Replace half the digestive biscuits with finely ground toasted almonds. Add a drizzle of honey on top before serving. The nutty crunch pairs beautifully with the chocolate, creating a sophisticated flavor combo.
Matcha Magic
Infuse the cream cheese mixture with 1 tsp matcha powder and a splash of green tea syrup. Top with white chocolate shavings for an elegant, earthy twist that’s perfect for a spring garden party.
Caramel Swirl
Fold in a couple of tablespoons of salted caramel sauce into the filling, then swirl with a toothpick for a marbled effect. The salty‑sweet balance elevates the mini cheesecakes to a dessert‑bar level.
Vegan Version
Use a plant‑based cream cheese, coconut cream instead of double cream, and vegan chocolate chips. The texture changes slightly, but the overall experience remains indulgent. I’ve served these at a vegan brunch and they were a hit.
Storing and Bringing It Back to Life
Fridge Storage
Place the cooled cheesecakes in an airtight container and store them in the refrigerator for up to 3 days. The flavors actually meld and improve after a night, making them even more delicious.
Freezer Friendly
Wrap each cheesecake individually in plastic wrap, then stack them in a freezer‑safe zip‑lock bag. They’ll keep for up to 2 months. When you’re ready to serve, thaw them in the fridge overnight and give them a quick 5‑minute sit at room temperature before adding fresh topping.
Best Reheating Method
To revive a chilled cheesecake, place it on a microwave‑safe plate, sprinkle a tiny splash of water (about a teaspoon) around the edge, and microwave for 10‑15 seconds. The steam generated brings back that soft, melt‑in‑your‑mouth texture without over‑cooking.