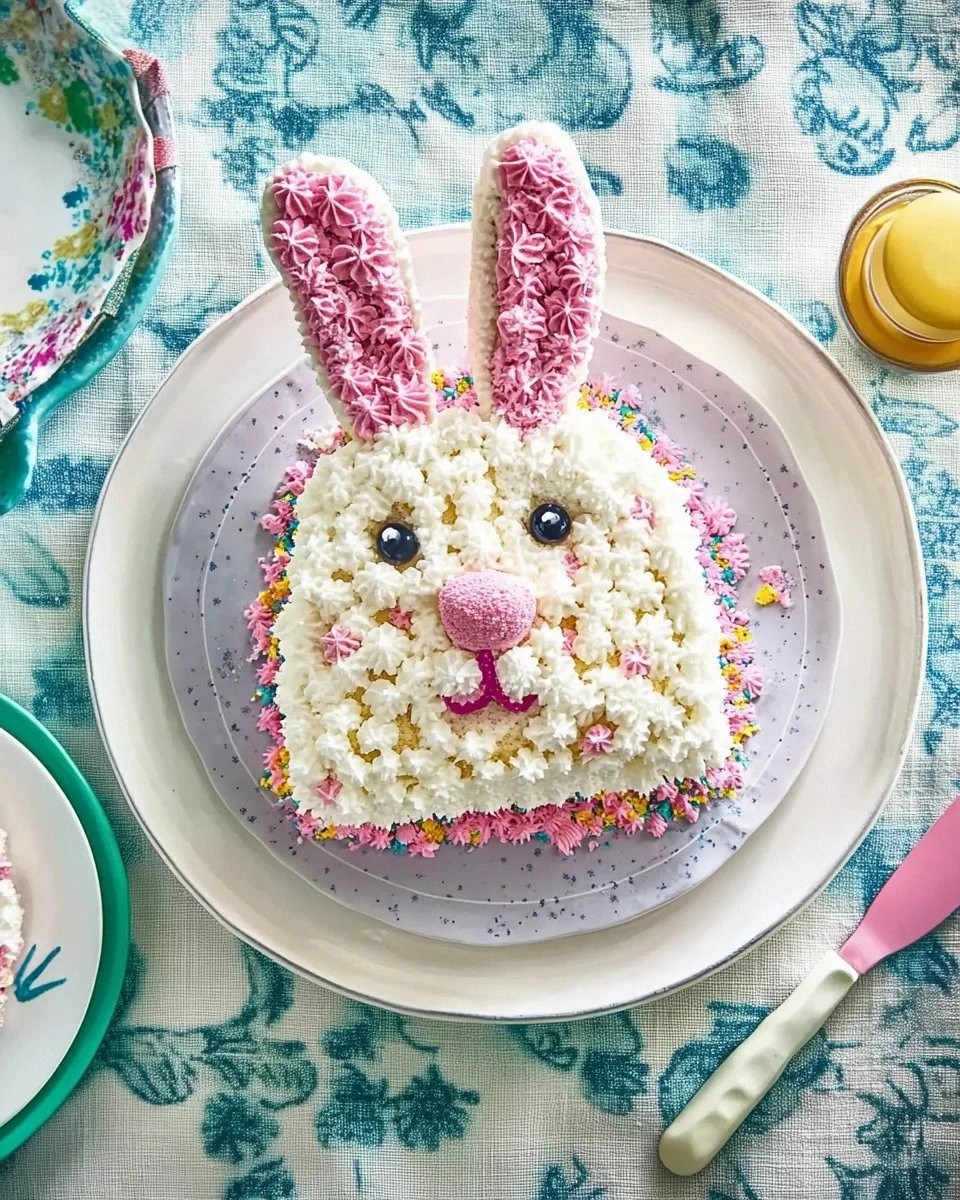
It all started on a chaotic Easter Sunday when my cousin’s five‑year‑old decided the family’s traditional carrot cake was “too boring” and demanded something that actually looked like a bunny. I stared at a blank kitchen counter, the scent of butter and sugar swirling like a promise, and thought, “What if I could turn a simple cake into a show‑stopping centerpiece that even the pickiest kid can’t resist?” The result? A fluffy, buttery bunny that practically hops off the plate, demanding attention and a second helping. I dare you to taste this and not go back for seconds.
The moment I pulled the finished bunny from the oven, the whole house was hit with a warm, sweet aroma that reminded me of springtime picnics and fresh‑cut grass. The frosting shimmered like sunrise on a dewy meadow, while the shredded coconut dusted the ears like fluffy clouds. I could hear the faint crackle of the oven’s cooling fan, the soft thud of the cake settling onto the cooling rack, and the excited giggles of kids already eyeing the sprinkles and jelly beans like treasure. My hands felt a little sticky, the kitchen was warm, and the air was thick with anticipation.
Most bunny cake recipes I’ve tried either ended up looking like a lopsided marble or tasted like a bland sugar bomb. This version, however, is hands down the best version you’ll ever make at home because it balances flavor, texture, and visual wow‑factor in a way that feels both nostalgic and fresh. I’ve swapped the usual heavy buttercream for a light, airy version that holds its shape, added a secret splash of coconut milk for a hint of tropical silk, and used a clever layering trick that makes the ears stand up proudly without any toothpicks. The result is a cake that not only looks adorable but also tastes like a celebration in every bite.
And now the fun part: there’s a surprise ingredient that most people completely overlook—a dash of pink food‑coloring gel mixed into the frosting to give it a subtle blush that mimics a real bunny’s cheek. This tiny tweak makes the whole cake pop without looking artificial. Okay, ready for the game‑changer? Let me walk you through every single step — by the end, you’ll wonder how you ever made it any other way.
What Makes This Version Stand Out
- Flavor: The buttercream is infused with a whisper of coconut milk, giving it a tropical undertone that pairs perfectly with the sweet vanilla cake.
- Texture: A light, fluffy crumb meets a creamy frosting that holds its shape, while the shredded coconut adds a delicate chew.
- Simplicity: You only need five core ingredients and a handful of pantry staples—no fancy equipment required.
- Uniqueness: The pink‑blush frosting and coconut “fur” turn an ordinary cake into an Instagram‑ready masterpiece.
- Crowd Reaction: Kids and adults alike gasp at the first reveal, then line up for seconds; I’ll be honest — I ate half the batch before anyone else got to try it.
- Ingredient Quality: Using real butter and high‑quality cocoa ensures a rich, authentic taste that store‑bought mixes can’t match.
- Cooking Method: The two‑stage baking (first cake, then assemble) guarantees even rise and perfect stability for the bunny shape.
- Make‑Ahead Potential: Bake the rounds ahead of time, store them airtight, and assemble the bunny the night before any celebration.
Inside the Ingredient List
The Flavor Base
The heart of this bunny cake is the vanilla‑scented sponge. Using real vanilla extract (or the good‑stuff vanilla bean paste) gives the cake a depth that artificial flavor can’t touch. If you skip the vanilla, you’ll end up with a bland canvas that lets the frosting dominate in a way that feels one‑dimensional. For a subtle twist, try swapping half the milk for coconut milk; it adds a buttery richness without overpowering the sweet notes. When shopping for flour, choose a low‑protein all‑purpose variety to keep the crumb tender.
The Texture Crew
Buttercream frosting is the star here, and the secret lies in the ratio of butter to powdered sugar. Too much sugar makes it stiff; too little makes it melt. I use 2 cups of buttercream that’s been whipped until it’s light as a cloud—think of it as a pillow you could sink into. Shredded coconut adds a whisper of chew and visual “fur” that mimics a bunny’s soft coat. If you’re allergic, try finely chopped almonds or toasted oats for a similar texture.
The Unexpected Star
Pink or red food‑coloring gel isn’t just for aesthetics; it subtly flavors the frosting with a faint berry undertone when you use a high‑quality gel. This tiny flavor boost makes the cheeks feel more “real” and adds a layer of complexity that most recipes miss. A few drops are enough—over‑coloring can taste metallic, so start with a little and build up.
The Final Flourish
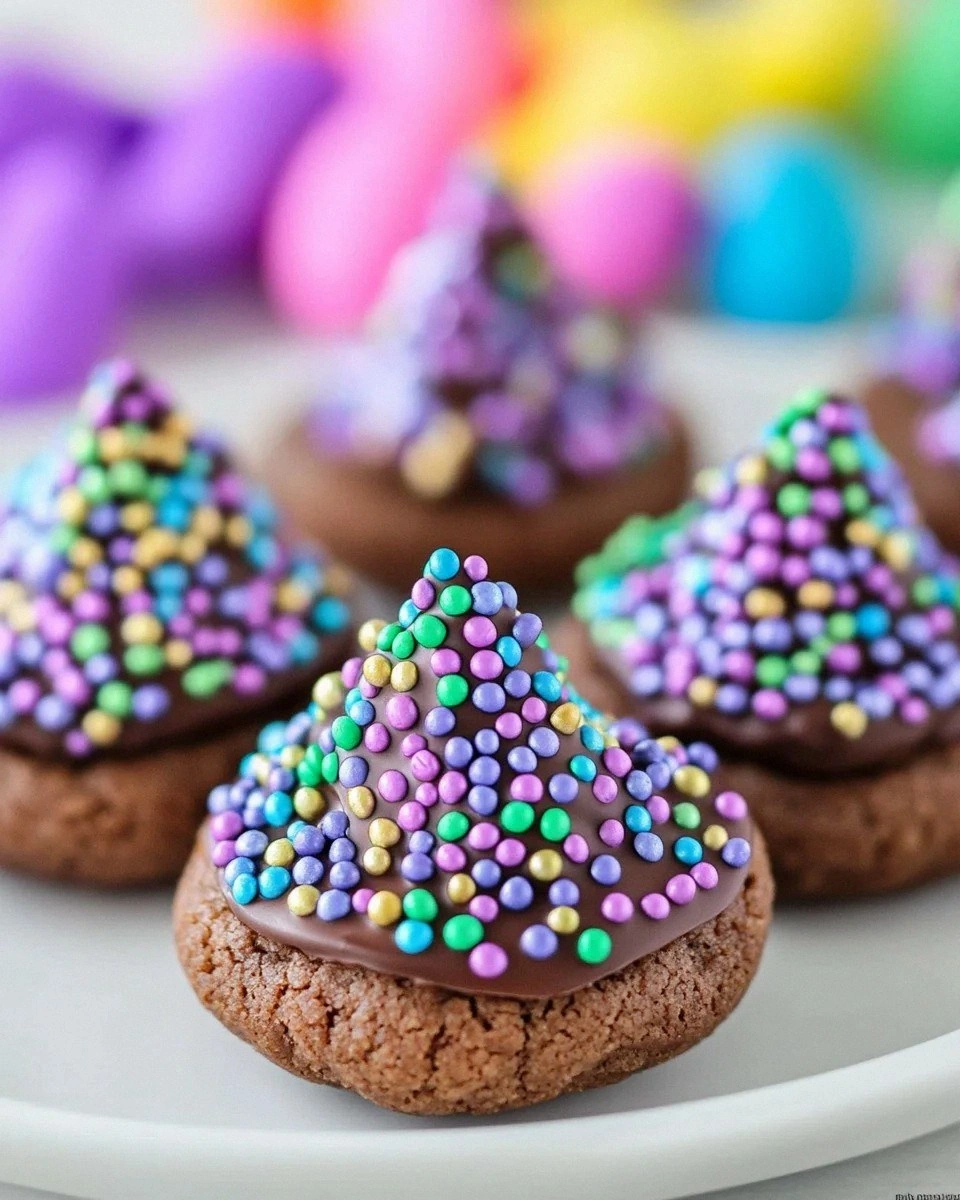
Sprinkles and jelly beans are the final decorative flourish that turns a cute bunny into a party‑ready masterpiece. Their crunch provides a pleasant contrast to the soft frosting, while the bright colors echo the joy of Easter celebrations. If you want a more sophisticated look, swap the jelly beans for candied orange peel or toasted almond slivers. Just remember: the visual impact matters as much as the taste, especially when you’re aiming for that “wow” moment when the cake is revealed.
Everything’s prepped? Good. Let’s get into the real action…

The Method — Step by Step
Preheat your oven to 350°F (175°C) and grease two 8‑inch round cake pans, then line them with parchment. The moment the batter hits the pan, you’ll hear a soft thud that promises a tender crumb. I always tap the pans lightly on the counter to settle the batter—this eliminates air pockets that can cause uneven rising. Let the pans sit while you whisk the dry ingredients; the scent of flour and sugar should already be making you smile.
In a large bowl, cream 1 cup (2 sticks) of room‑temperature butter until it’s pale and fluffy, then gradually add 2 cups powdered sugar, a pinch of salt, and 2 tbsp coconut milk. The mixture should look like fresh snow—soft, light, and ready to hold air. Add 1 tsp vanilla extract and a dash of pink food‑coloring gel; watch the color bloom like a sunrise. This is the moment of truth: the frosting must be smooth enough to spread without tearing the cake layers later.
Kitchen Hack: Use a handheld mixer on low speed for the first minute to avoid splattering, then switch to high for a glossy finish.In another bowl, whisk together 2 cups all‑purpose flour, 1 ½ tsp baking powder, and ½ tsp baking soda. Sift the dry mix into the butter mixture in three additions, alternating with 1 cup whole milk. Each addition should be folded gently until just combined; over‑mixing will create a dense crumb that defeats the bunny’s lightness. The batter will be thick but pourable—think of it as a smooth river of gold.
Divide the batter evenly between the prepared pans, smoothing the tops with a spatula. Tap the pans on the counter three times to release any trapped air bubbles. Slide them into the oven and bake for 25‑30 minutes, or until a toothpick inserted into the center comes out clean. The edges will start pulling away from the pan—this is your visual cue that the cake is done. While the cakes bake, set a timer and start prepping the frosting.
While the cakes cool, whip the remaining 1 cup butter with 1 cup powdered sugar, 2 tbsp coconut milk, and a splash of vanilla until it reaches a silky consistency. Fold in ½ cup shredded coconut for that “fur” effect; the coconut should cling lightly to the butter, creating tiny islands of texture. Add a few more drops of pink food‑coloring if you desire a deeper blush. The frosting should be spreadable but firm enough to hold shape—think of it as soft‑serve that won’t melt on a warm day.
Once the cakes have cooled completely on a wire rack, level the tops with a serrated knife to create flat surfaces. This is crucial because uneven layers cause the ears to tilt. Place one cake layer on a serving platter and spread a generous layer of frosting over it, leaving a small border around the edge. Position the second cake on top, then turn the whole stack 90 degrees so the “head” faces you. This orientation makes it easier to carve the bunny shape.
Using a sharp, offset spatula, carve the bunny’s head, ears, and body from the stacked cakes. The ears should be about 2‑inch tall and slightly pointed at the tips—if you’re nervous, trace a bunny silhouette onto parchment first. As you carve, you’ll hear the faint “crack” of the crumb separating, a satisfying sound that tells you you’re on the right track. Keep the scrap pieces; you can dice them for a “carrot” garnish later.
Cover the entire bunny with a thin “crumb coat” of frosting, then chill for 10 minutes to set. After chilling, apply the final layer of pink‑blush buttercream, smoothing it with a bench scraper for a flawless finish. Sprinkle shredded coconut over the ears and back to mimic fur, then scatter sprinkles and jelly beans across the belly and tail. The final visual should look like a springtime bunny ready to hop onto the dessert table.
That’s it — you did it. But hold on, I’ve got a few more tricks that’ll take this to another level…
Insider Tricks for Flawless Results
The Temperature Rule Nobody Follows
Never bake a cake with cold ingredients. Let butter, eggs, and milk sit at room temperature for at least 30 minutes before mixing. This ensures a uniform emulsion, which translates into a tender crumb that rises evenly. I once tried using chilled butter straight from the fridge; the cake turned out dense and heavy, like a brick. Trust me, this small step makes a massive difference.
Why Your Nose Knows Best
When the cake is in the oven, listen for the subtle change in aroma. At first, you’ll smell sweet vanilla; about two minutes before it’s done, a nutty, caramelized scent emerges. That’s your cue to start checking the edges. If you wait for the timer alone, you risk over‑baking and a dry texture. Follow your nose, and you’ll get that perfect, moist bite every time.
The 5‑Minute Rest That Changes Everything
After you pull the baked layers from the oven, let them rest on the rack for exactly five minutes before turning them out. This short pause lets the steam settle, preventing the cakes from collapsing or cracking when you flip them. I once rushed this step and the layers broke apart, turning my bunny into a sad pancake. Patience here pays off in stability for the final shape.
Frosting Consistency Cheat Sheet
Soft enough to spread, firm enough to hold shape—that’s the sweet spot. If the frosting feels too runny, add a tablespoon of powdered sugar; if it’s too stiff, whisk in a teaspoon of milk or coconut milk. The goal is a texture that slides off the spatula like a silk scarf, not a clumpy paste. A quick test: dip a spoon into the frosting; it should coat the spoon without dripping.
Final Touch: The Jelly Bean Surprise
Scatter jelly beans just before serving, not before chilling. This prevents them from melting into the frosting and losing their crunch. The pop of candy against the creamy frosting adds a playful surprise that kids love. I once tried pre‑decorating and ended up with a soggy, sweet mess—lesson learned!
Creative Twists and Variations
This recipe is a playground. Here are some of my favorite ways to switch things up:
Chocolate Bunny
Replace half of the all‑purpose flour with cocoa powder and add ¼ cup melted dark chocolate to the batter. Use a chocolate buttercream and dust the ears with cocoa nibs for an elegant, grown‑up version that still feels festive.
Fruit‑Infused Fur
Swap shredded coconut for finely chopped dried apricots or mango. The natural sweetness and chewy texture mimic fur while adding a burst of tropical flavor that pairs beautifully with the vanilla base.
Spicy Easter
Incorporate a pinch of ground cinnamon and a dash of cayenne into the batter for a subtle heat. Finish with a cream cheese frosting tinted with orange food‑coloring for a “carrot” vibe that’s both daring and delicious.
Mini Bunny Cupcakes
Instead of two 8‑inch rounds, bake the batter in a muffin tin (12‑15 min). Assemble each cupcake with a tiny dollop of frosting, a coconut “ear,” and a single jelly bean for a bite‑size version perfect for parties.
Vegan Version
Use a plant‑based butter substitute and replace the dairy milk with almond or oat milk. Swap powdered sugar for a fine coconut sugar blend and use a vegan coconut‑milk‑based frosting. The result is just as fluffy and festive, catering to all dietary needs.
Storing and Bringing It Back to Life
Fridge Storage
Cover the assembled bunny loosely with a dome or large airtight container. It will stay fresh for up to three days. If you notice the frosting drying out, place a slice of fresh apple on the side of the container; the moisture will keep the frosting supple.
Freezer Friendly
Wrap the cake tightly in plastic wrap, then a layer of aluminum foil. Freeze for up to one month. When you’re ready to serve, move it to the fridge overnight to thaw, then let it sit at room temperature for 30 minutes before frosting again.
Best Reheating Method
To revive a slightly stale slice, microwave it for 10‑12 seconds with a tiny splash of water on the plate. The steam generated will bring the crumb back to life, and the frosting will regain its silky sheen. Avoid microwaving the whole cake; the frosting can melt.