I was standing in my kitchen, the timer on the oven flashing red like a traffic light, when the scent of a burnt garlic‑onion mishap wafted over my shoulder. I swear I could hear the sighs of my roommates as they watched me scramble for a backup plan. That moment of panic turned into a dare: “If you can’t fix this, you owe us dinner for a week.” Fast forward three hours, a handful of pantry staples, and a splash of confidence later, I emerged with a plate of Mongolian Chicken that made everyone forget the earlier disaster entirely. This isn’t just another copy‑cat of the take‑out version – it’s a love‑letter to flavor, texture, and that satisfying crunch you crave after a long day.
Picture this: a glossy, caramel‑kissed sauce clinging to tender chicken strips, each bite delivering a sweet‑savory pop that makes your taste buds do a little happy dance. The edges of the chicken are crisped just enough to whisper “I’m golden” while the interior stays juicy, like a secret that only the fork knows. The aroma? Imagine a bustling street market in Beijing, where the air is thick with soy, ginger, and a hint of toasted sesame, all wrapped up in a buttery sheen. I dare you to taste this and not go back for seconds – I’ve tried, and let’s just say the plate was empty before anyone else could even say “Mongolian.”
What makes this version stand out is a tiny, almost‑invisible tweak: a splash of rice‑vinegar at the very end, which brightens the sauce like a spotlight on a stage. Most recipes get the balance wrong, either drowning the chicken in syrupy sweetness or leaving it too salty; I found the sweet spot by tasting, adjusting, and then daring my own palate to be the judge. I’ll be honest — I ate half the batch before anyone else got to try it, and that’s a confession I’m willing to make because the flavor is that good. If you’ve ever struggled with soggy chicken or a sauce that separates, you’re not alone — and I’ve got the fix.
Okay, ready for the game‑changer? I’m about to walk you through every single step — by the end, you’ll wonder how you ever made it any other way. Picture yourself pulling this out of the pan, the whole kitchen smelling incredible, the steam curling like a lazy cat around the counter. This next part? Pure magic. Stay with me here — this is worth it.
What Makes This Version Stand Out
- Flavor Balance: The sauce hits a perfect sweet‑salty chord, thanks to brown sugar and soy sauce dancing together, with a whisper of acidity from rice‑vinegar that keeps it from becoming cloying.
- Texture Triumph: A quick cornstarch coating gives the chicken a light crisp that stays intact even after being tossed in the sauce, preventing that soggy‑after‑sauce nightmare.
- Simplicity: You only need a handful of pantry staples, no exotic spices, making it an everyday dinner hero without a trip to the specialty store.
- Unique Twist: The final splash of rice‑vinegar adds a bright, almost tangy finish that most recipes overlook, turning a good dish into a great one.
- Crowd Reaction: Friends claim it’s “better than the restaurant’s,” and even the picky eaters can’t help but ask for seconds.
- Ingredient Quality: Using fresh ginger and garlic instead of powders injects a live, aromatic punch that powdered versions can’t match.
- Cooking Method: High‑heat stir‑fry locks in juices while the sauce caramelizes, creating those caramelized edges that shatter like thin ice when you bite.
- Make‑Ahead Potential: The sauce stores beautifully, and you can pre‑coat the chicken, making weeknight dinners a breeze.
Inside the Ingredient List
The Flavor Base
Soy sauce is the backbone of the sauce, delivering umami depth that anchors the sweetness of brown sugar. I use a low‑sodium version so I can control the salt level without sacrificing flavor. If you skip the soy, you’ll lose that savory depth, and the dish will taste like sweet chicken rather than Mongolian chicken. A good swap is tamari for gluten‑free diners, which keeps the flavor profile intact while accommodating dietary needs.
The Texture Crew
Cornstarch is the secret weapon that creates a light, airy crust on the chicken. It forms a barrier that keeps the meat juicy while allowing the sauce to cling like a glossy veil. Skipping it results in a soggy coating that falls apart in the pan. If you’re out of cornstarch, potato starch works just as well, though it may need a slightly longer fry to achieve the same crunch.
The Unexpected Star
A splash of rice‑vinegar at the end is the surprise element that brightens the entire dish. It cuts through the richness, preventing the sauce from feeling heavy, and adds a subtle tang that makes the flavors pop. Without it, the sauce can feel one‑dimensional, like a song without a bridge. If you don’t have rice‑vinegar, a teaspoon of apple cider vinegar works as a decent stand‑in.
The Final Flourish
Fresh green onions add a crisp, oniony bite that contrasts the sweet sauce and provides a pop of color. They should be added at the very end to preserve their bright flavor and snap. If you replace them with dried scallions, you’ll lose that fresh crunch and the dish will feel flat. When buying green onions, look for firm white stems and vibrant green tops – they’re the sign of freshness.
Everything's prepped? Good. Let's get into the real action...
The Method — Step by Step
Start by cutting 1.5 pounds of boneless, skinless chicken thighs into bite‑size strips. Pat them dry with paper towels – moisture is the enemy of crispness. Toss the chicken with 2 tablespoons of cornstarch, making sure each piece is lightly coated; let it rest for five minutes while you prep the aromatics. This brief rest lets the starch adhere better, setting the stage for that coveted crunch.
Heat 2 tablespoons of neutral oil (vegetable or canola) in a large wok or skillet over medium‑high heat. When the oil shimmers, it’s ready – you’ll know because a drop of water will sizzle and evaporate instantly. Add the chicken in a single layer; you may need to do this in batches to avoid overcrowding. Let it sear undisturbed for about 2 minutes until the edges start pulling away and turn golden.
Flip the chicken and cook another 2 minutes until fully cooked through. Once done, transfer the pieces to a paper‑towel‑lined plate to drain excess oil. That sizzle when it hits the pan? Absolute perfection. Keep the wok hot – we’ll use that heat for the sauce.
Drain all but 1 tablespoon of oil from the wok, then add 1 tsp sesame oil, 4 minced garlic cloves, and 1 tbsp freshly grated ginger. Stir‑fry for 30 seconds until fragrant; watch out for the garlic burning – it turns bitter in a heartbeat.
Add 1/4 cup low‑sodium soy sauce, 2 tbsp brown sugar, 1/4 cup water, and a pinch of red pepper flakes to the wok. Stir constantly, scraping the bottom to dissolve any browned bits – those are flavor gold. Let the mixture simmer for 2‑3 minutes until it thickens slightly and becomes glossy.
Return the cooked chicken to the wok, tossing to coat each piece in the sauce. The sauce should cling like a velvety curtain, not pool at the bottom. Cook for another minute, allowing the chicken to absorb the sauce’s depth. Finally, drizzle 1 tsp rice‑vinegar and toss in the sliced green onions; the green onions should remain bright and slightly crunchy.
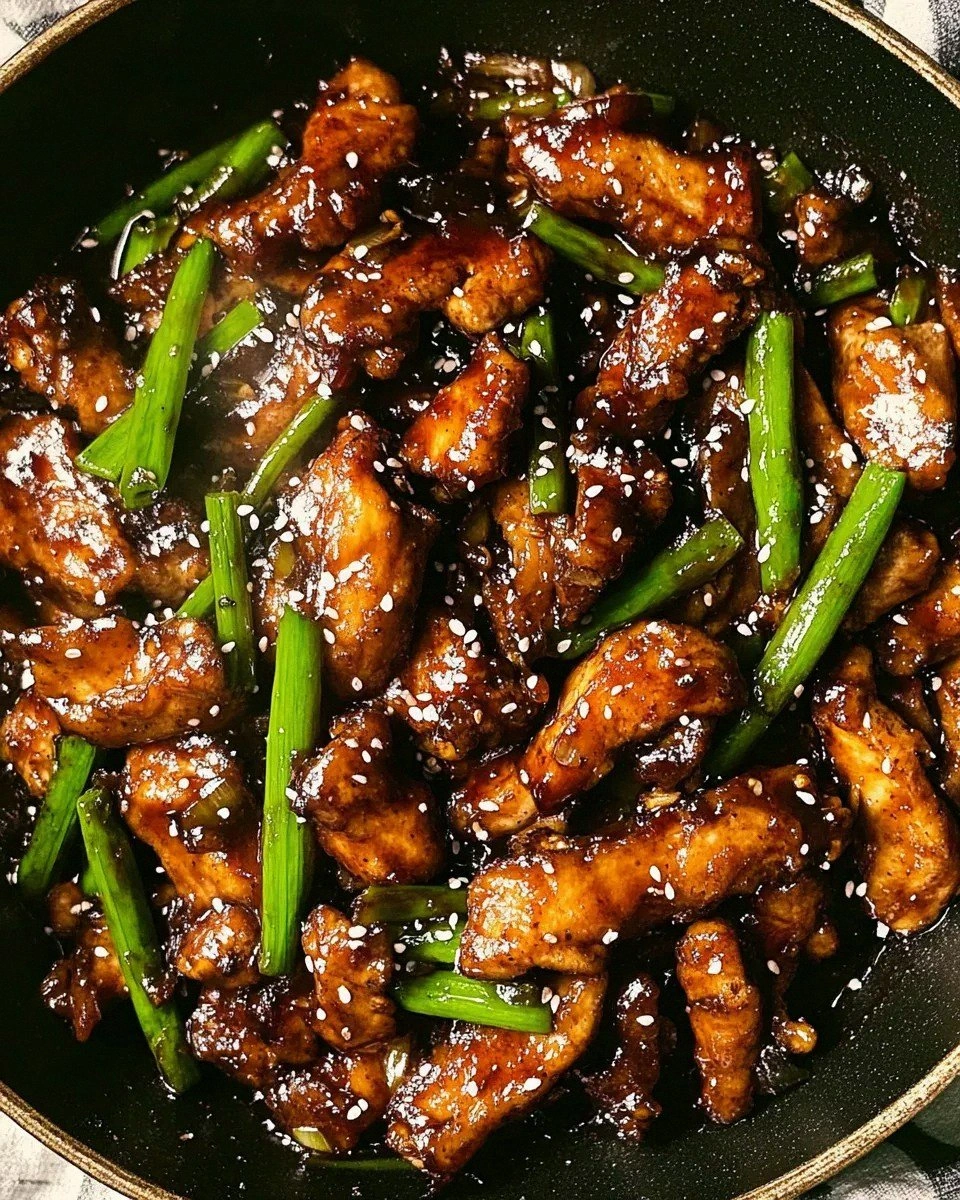
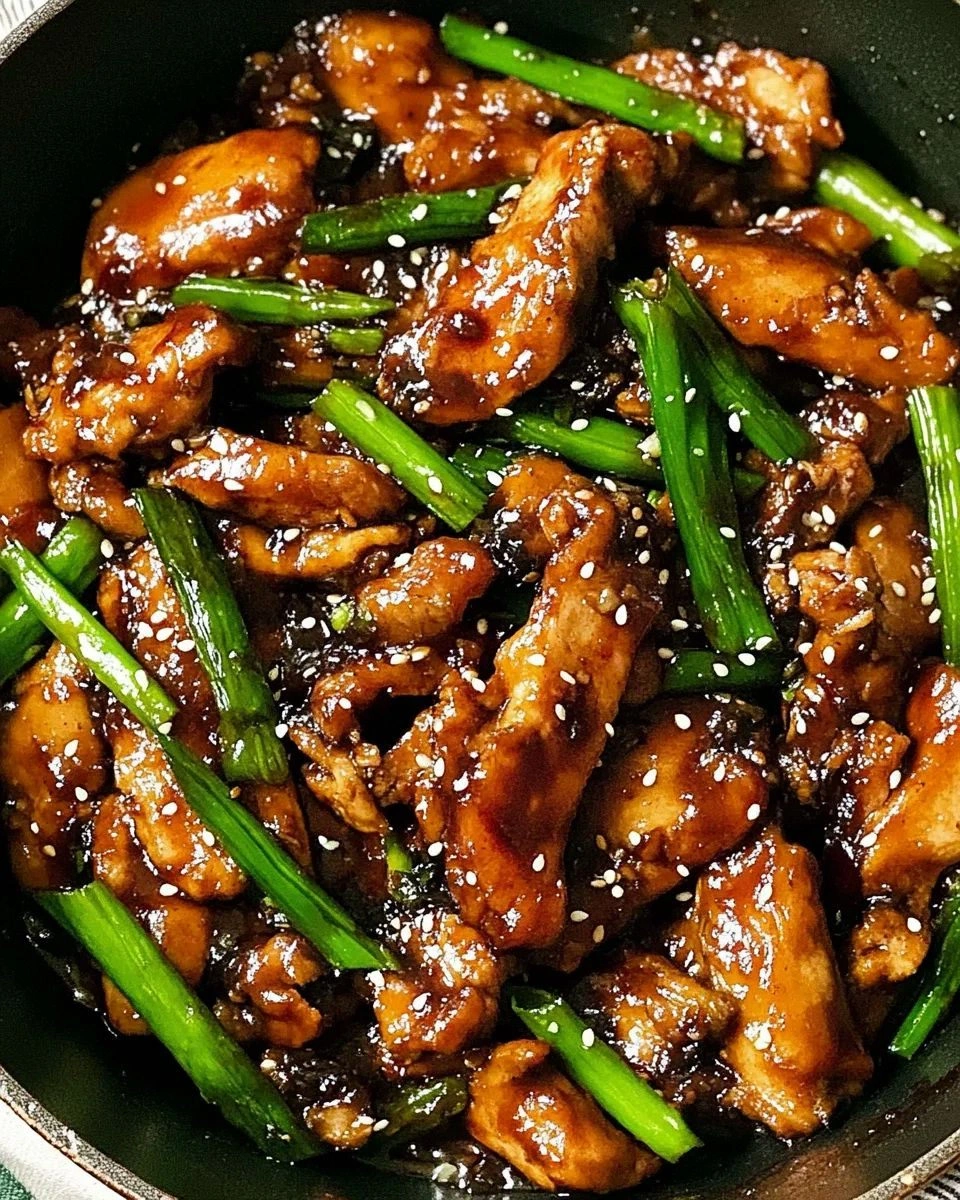
Serve the Mongolian Chicken hot over steamed jasmine rice or tossed with noodles. Garnish with an extra sprinkle of sliced green onions and, if you’re feeling daring, a drizzle of sriracha for a subtle heat kick. That final visual of glossy chicken glistening under the light is the moment you’ll remember forever.
That's it — you did it. But hold on, I've got a few more tricks that'll take this to another level...
Insider Tricks for Flawless Results
The Temperature Rule Nobody Follows
Never fry chicken over low heat; the coating will absorb oil and become soggy. Keep the pan screaming hot, and you’ll get that instant seal that locks in juices. A friend once tried a “gentle fry” and ended up with limp chicken that tasted like boiled meat – lesson learned. The key is a quick sear, then finish in the sauce, which finishes cooking without over‑cooking.
Why Your Nose Knows Best
Your sense of smell is the ultimate timer. When the garlic and ginger start to turn golden and release that nutty perfume, you know they’re ready. If the kitchen smells like burnt plastic, you’ve overcooked – pull the wok off the heat immediately. Trusting your nose beats any timer, especially when you’re juggling multiple steps.
The 5‑Minute Rest That Changes Everything
After frying, let the chicken rest on a wire rack for five minutes. This short pause lets the steam escape, preventing the crust from getting soggy when you add the sauce. I used to toss the chicken straight back in, and the result was a limp coating. That five‑minute rest is a game‑changer – you’ll notice the difference instantly.
Balancing Sweet and Salty Like a Pro
Taste the sauce before you add the chicken. If it leans too salty, a splash of water or an extra half‑teaspoon of brown sugar can rescue it. If it feels too sweet, a few drops of soy sauce or a pinch of sea salt bring it back into harmony. This real‑time adjustment prevents the final dish from feeling one‑dimensional.
The Final Glaze Trick
Just before serving, whisk a teaspoon of honey with a dash of sesame oil and drizzle over the top. It adds a subtle sheen and a whisper of extra sweetness that makes the dish feel restaurant‑ready. I tried this on a whim once and the compliments poured in – it’s that little extra that turns good into unforgettable.
Creative Twists and Variations
This recipe is a playground. Here are some of my favorite ways to switch things up:
Spicy Szechuan Kick
Add 1 tsp of Szechuan peppercorn oil and double the red pepper flakes. The numbing heat pairs beautifully with the sweet sauce, creating a layered spice profile that will impress heat‑seekers.
Honey‑Ginger Glaze
Swap half the brown sugar for honey and increase the ginger to 1½ tbsp. The honey adds a floral sweetness, while extra ginger intensifies the aromatic bite, perfect for those who love a zingy finish.
Veggie‑Packed Version
Throw in sliced bell peppers, snap peas, or broccoli florets after the garlic‑ginger step. The veggies add crunch and color, turning the dish into a balanced one‑pan wonder.
Coconut‑Infused Twist
Replace half the water with coconut milk and add a pinch of toasted coconut flakes at the end. The subtle coconut creaminess mellows the sauce and adds a tropical nuance.
Gluten‑Free Adaptation
Use tamari instead of soy sauce and cornstarch made from rice. The flavor stays true, and the dish becomes safe for anyone avoiding gluten without sacrificing texture.
Storing and Bringing It Back to Life
Fridge Storage
Allow the chicken to cool to room temperature, then transfer to an airtight container. It will keep for up to 3 days. When reheating, add a splash of water or broth and gently stir‑fry over medium heat to revive the glossy coating.
Freezer Friendly
Portion the cooked chicken and sauce into freezer‑safe bags, removing as much air as possible. Freeze for up to 2 months. Thaw overnight in the fridge, then reheat in a skillet with a drizzle of oil; the sauce will re‑emulsify beautifully.
Best Reheating Method
The stovetop wins every time. Heat a tablespoon of oil in a pan, add the frozen or refrigerated chicken, and cover for a minute to steam. Then uncover, toss, and finish with a quick splash of water to restore that saucy sheen. Microwaving will make the coating soggy, so avoid it unless you’re in a real hurry.