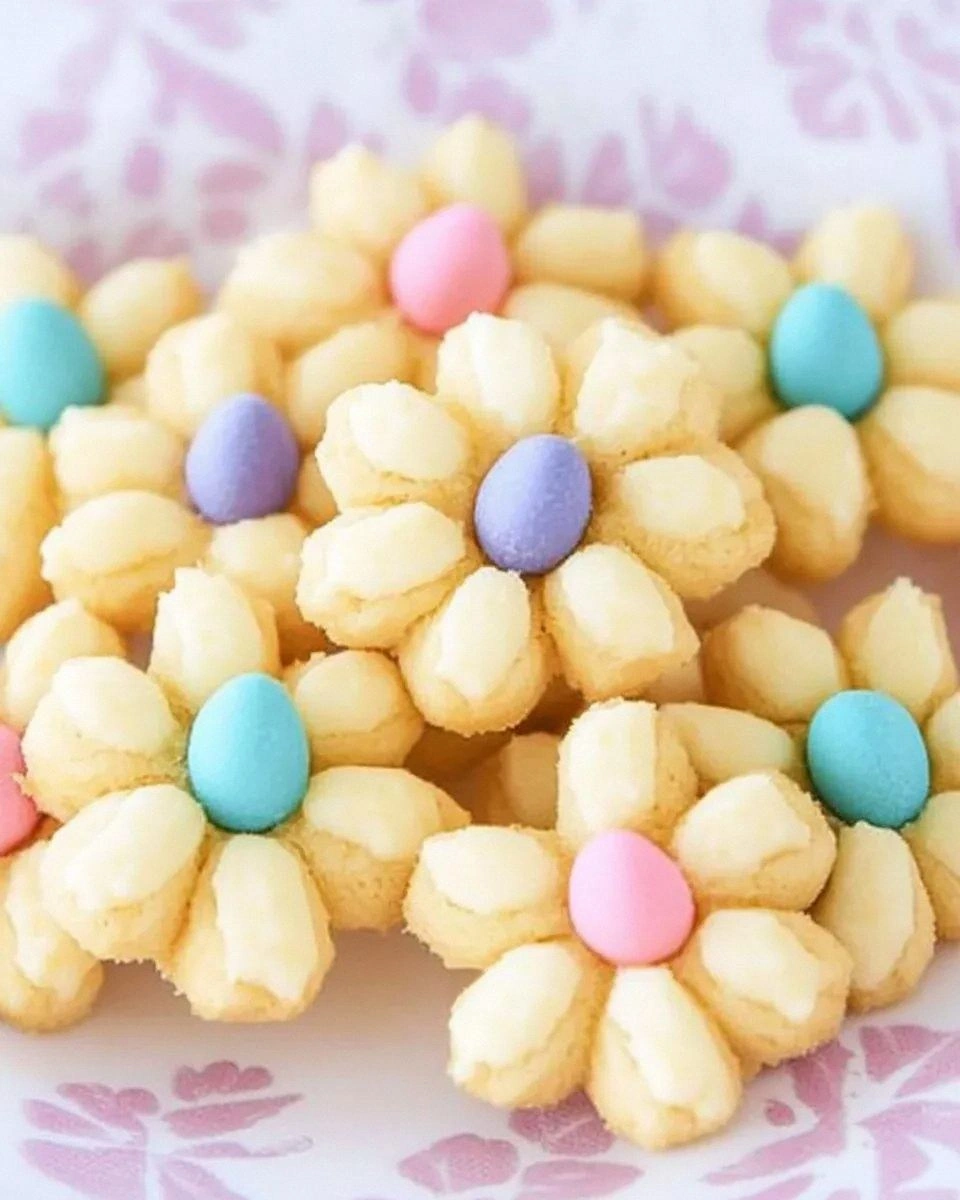
Picture this: a rainy Saturday afternoon, the kind where you’re stuck inside, scrolling through endless recipe blogs, and a sudden dare pops up in the group chat – “Make something that looks like Easter but tastes like dessert heaven.” I laughed, rolled my eyes, and thought, “Challenge accepted.” Little did I know that the kitchen would turn into a battlefield of melted chocolate, squeaky mixers, and a half‑finished batch of cheesecake that I devoured before anyone else even saw the eggs. That moment of guilty indulgence became the spark for the most unforgettable Easter treat you’ll ever encounter.
The moment the chocolate hit the pan, a glossy river of dark decadence poured across the stove, releasing an aroma that reminded me of a springtime forest after a rainstorm – earthy, sweet, and oddly comforting. The scent of cream cheese mingling with the caramel‑kissed condensed milk made my taste buds do a tiny happy dance, while the faint citrus tang of lemon juice whispered promises of brightness. I could hear the faint crackle of the chocolate as it settled, feel the buttery smoothness of the batter between my fingers, and see the glossy sheen that would soon become the shell of our Easter eggs. It was a full‑on sensory overload, the kind that makes you realize cooking is not just food preparation but a full‑body experience.
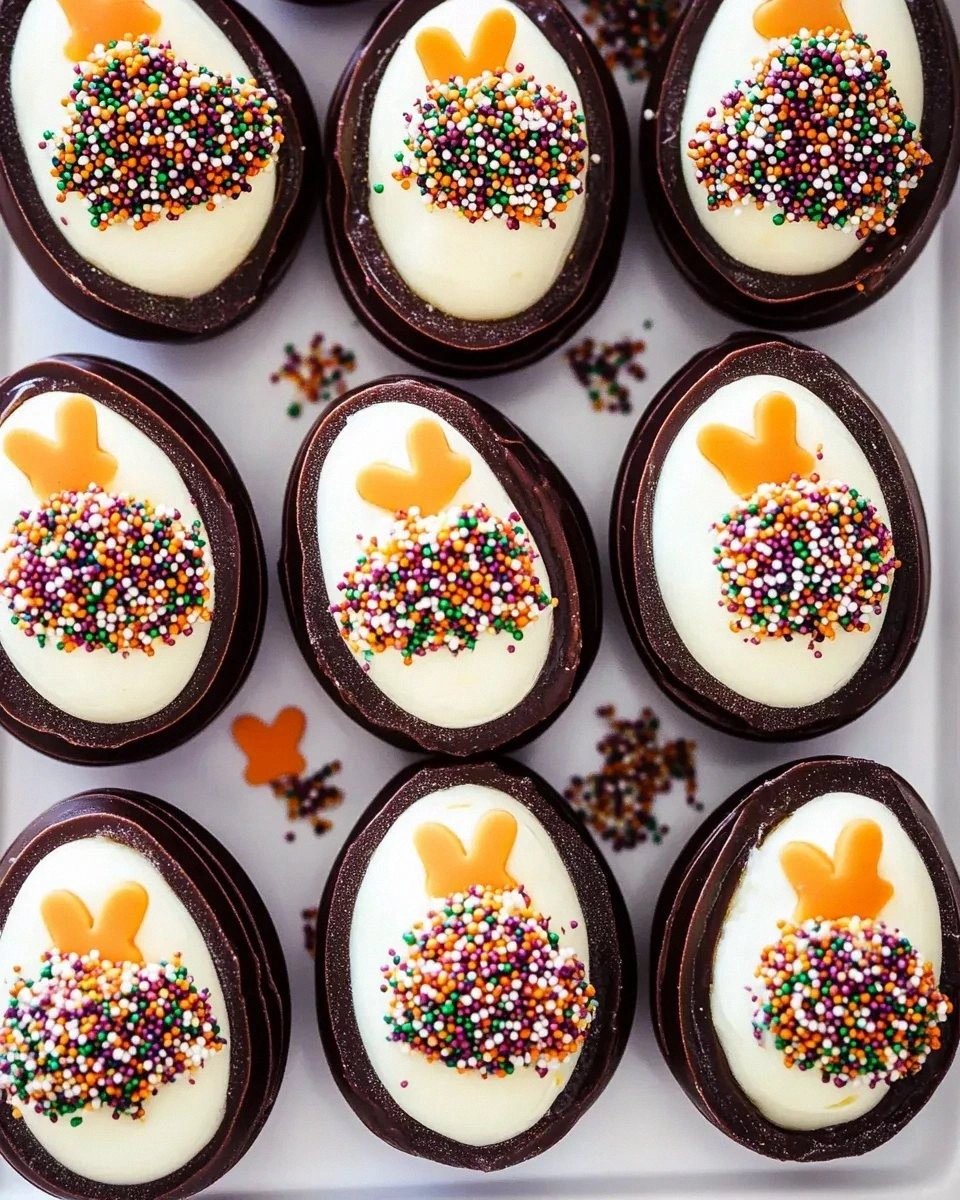
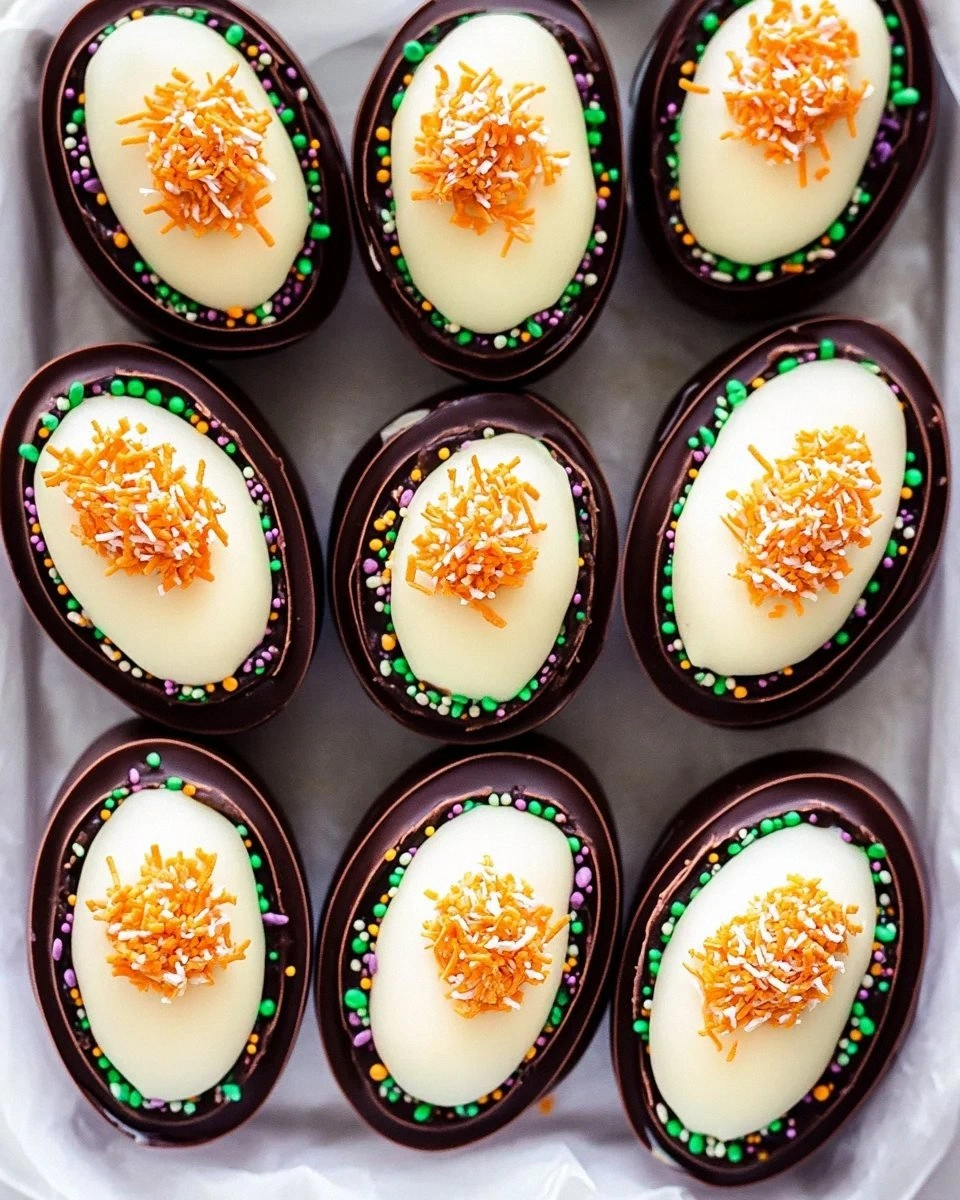
Most Easter egg recipes either hide a bland candy center or rely on a sugary glaze that melts away at the first bite. This version, however, flips the script by stuffing a velvety cheesecake into a chocolate shell that’s crisp on the outside and melt‑in‑your‑mouth on the inside. The contrast is so striking that even the most skeptical palate will be forced to admit, “Okay, this is hands down the best version you’ll ever make at home.” And the secret? A surprise ingredient that adds a whisper of citrus and a silky texture that most recipes completely miss.
Now, I’m going to walk you through every single step – from tempering chocolate like a pro to folding the cheesecake filling without deflating it. By the end, you’ll wonder how you ever settled for anything less than this sweet surprise. I dare you to taste this and not go back for seconds.
What Makes This Version Stand Out
- Flavor Explosion: The marriage of rich chocolate and tangy cheesecake creates a flavor duet that sings louder than any traditional Easter candy.
- Texture Symphony: A crisp, glossy shell gives way to a creamy, slightly airy filling – think of a firm hug that turns into a soft whisper.
- Simplicity Meets Sophistication: Despite the impressive presentation, the technique uses pantry staples and a few pro tips, no fancy equipment required.
- Unique Surprise: The lemon juice cuts through the sweetness, preventing cloying overload and adding a fresh spring note that most recipes miss.
- Crowd‑Pleaser Factor: Guests will rave, “Is this really an egg?” and then scramble for the second batch, because the novelty factor is off the charts.
- Ingredient Quality: Using high‑quality chocolate and full‑fat cream cheese ensures a luxurious mouthfeel that cheap alternatives can’t match.
- Make‑Ahead Magic: These eggs keep beautifully in the fridge, making them perfect for Easter brunches or any spring gathering.
- Visual Wow: The glossy finish and hidden creamy center look like something out of a patisserie, elevating any dessert table.
Alright, let's break down exactly what goes into this masterpiece...
Inside the Ingredient List
The Flavor Base
The star of this recipe is the 9 cups of chocolate of choice. Whether you opt for a bittersweet blend or a milk chocolate for a sweeter profile, the chocolate forms the shell that will hold the creamy secret. Skipping this or using low‑quality chips will result in a dull, crumbly exterior that won’t crack cleanly. If you’re feeling adventurous, a mix of dark and white chocolate creates a marbled effect that looks as good as it tastes.
Next up, the 2 8‑oz packages of cream cheese. Full‑fat cream cheese provides the richness and tang that balances the chocolate’s sweetness. Low‑fat versions will make the filling watery and less luxurious. For a dairy‑free twist, you can substitute with a plant‑based cream cheese, but expect a slightly different texture.
The Texture Crew
The 1 14‑oz can sweetened condensed milk acts as the glue that binds the cheesecake filling, adding a buttery caramel note while keeping the mixture silky. If you substitute with regular milk and sugar, you’ll lose that dense, melt‑in‑your‑mouth quality. Keep the can chilled until you’re ready to whisk; a cold can whips up faster and prevents splattering.
The 1 cup heavy cream is folded in at the end to lighten the filling, creating a mousse‑like consistency that feels airy against the chocolate shell. Over‑whipping will cause the mixture to separate, so stop as soon as soft peaks form. If you’re out of heavy cream, a blend of whole milk and a touch of melted butter can mimic the richness, though the texture will be slightly denser.
The Unexpected Star
A splash of 2 tablespoons lemon juice might seem odd in a chocolate dessert, but it’s the secret weapon that cuts through the richness, adding a bright, spring‑like zing. Too much lemon will curdle the cream cheese, so measure carefully. If you’re not a fan of citrus, a dash of orange zest can provide a similar lift without the acidity.
Finally, the 300 g chopped chocolate is melted and mixed with the heavy cream to create a glossy glaze that coats the eggs. This extra chocolate layer adds depth and a glossy finish that makes the eggs look professionally crafted. Use the same chocolate type as the shell for harmony, or switch to a contrasting flavor for a surprise twist.
The Final Flourish
The 9 slices of prepared cake serve as the base for shaping the egg molds. Think of them as the scaffolding that gives the chocolate its shape before it sets. If you’re gluten‑free, substitute with sturdy gluten‑free cake slices or even firm shortbread. The cake should be dry enough to hold the chocolate without soaking, so a light toast in the oven helps.
Everything's prepped? Good. Let's get into the real action...
The Method — Step by Step
Start by chopping the 9 cups of chocolate into uniform pieces and placing two‑thirds of it in a heat‑proof bowl. Melt the chocolate over a simmering pot of water (a double boiler) until it reaches 115°F (46°C). Stir constantly; you’ll hear a gentle hiss as the chocolate becomes a silky river. Once melted, remove from heat and set aside – this is the shell base.
While the chocolate cools slightly, whisk together the cream cheese and sweetened condensed milk in a stand mixer on medium speed. The mixture should become smooth, glossy, and slightly thick – think of a thick frosting that holds its shape on a spoon. Add the vanilla extract and lemon juice, then whisk for another minute until fully incorporated. That citrus tang is what will keep the flavor from becoming cloying.
In a separate saucepan, bring the heavy cream to a gentle simmer – do not boil. Once small bubbles form around the edges, pour the hot cream over the remaining 300 g chopped chocolate. Let it sit for 30 seconds, then stir until you have a glossy ganache. This ganache will be brushed onto the chocolate shells for an extra layer of shine and flavor.
Now, take each slice of prepared cake and cut it into a round shape that fits your egg mold (a silicone Easter egg mold works best). Place a thin layer of the melted chocolate shell into the mold, swirling to coat the interior. Let it set for about 2 minutes – you’ll see the edges start to pull away from the silicone, a sign it’s firm enough to hold the filling.
Once the shell is set, spoon a generous dollop of the cheesecake filling into the center of each shell, leaving a small gap at the top for the final chocolate seal. Use a small offset spatula to smooth the surface – the filling should be level, not lumpy. This is the moment of truth; the filling should feel light yet firm, like a cloud trapped in chocolate.
Re‑dip each filled egg back into the remaining melted chocolate, ensuring the top is completely sealed. Tap gently to remove excess chocolate and give the egg a smooth finish. Immediately brush the exterior with the ganache you prepared earlier for that extra glossy sheen.
After the chocolate has fully hardened, gently pop the eggs out of the silicone molds. You’ll hear a satisfying “pop” as the chocolate releases – that’s the sound of success. Transfer the eggs to a decorative platter, dust lightly with powdered sugar if desired, and let them sit at room temperature for 5 minutes before serving.
That’s it — you did it. But hold on, I've got a few more tricks that'll take this to another level. For instance, a quick drizzle of raspberry coulis adds a pop of color, and a sprinkle of toasted almond slivers gives a crunchy contrast that elevates the texture profile.
Insider Tricks for Flawless Results
The Temperature Rule Nobody Follows
Chocolate is temperamental (pun intended). Always aim for a final working temperature of 88‑90°F (31‑32°C) for dark chocolate and 86‑88°F (30‑31°C) for milk chocolate. Use an instant‑read thermometer – I swear by it. If the chocolate is too hot, it will bloom (white streaks) and lose its snap. I once tried to skip this step and ended up with a matte, dull shell that looked like a melted candle.
Why Your Nose Knows Best
Don’t rely solely on timers. The scent of toasted chocolate is a reliable cue that the shell is ready for the next step. When you smell a faint, nutty aroma, that’s the sweet spot. Trusting your nose saved me from a batch that was over‑cooked and bitter.
The 5‑Minute Rest That Changes Everything
After filling the eggs, let them rest in the fridge for exactly five minutes before sealing the top layer. This short pause lets the cheesecake firm up just enough to hold its shape without spilling when you add the final chocolate coat. Skipping this rest leads to messy edges and a soggy shell.
Silicone Molds vs. Metal Molds
Silicone molds release the chocolate effortlessly, whereas metal molds can cause the chocolate to stick, especially if they’re not well‑greased. I once used a metal mold and spent ten minutes coaxing each egg out, losing precious decorative flair. Stick with silicone for a clean release and a professional look.
Finishing Flourish: The Ganache Brush
Brushing the ganache on after the final seal adds a mirror‑like finish that makes the eggs look like they belong in a boutique patisserie. Use a small pastry brush and work quickly; the ganache can set fast in cooler kitchens. A thin, even coat is all you need – no need for a thick glaze.
Creative Twists and Variations
This recipe is a playground. Here are some of my favorite ways to switch things up:
Berry Burst
Fold a handful of fresh raspberries or strawberries into the cheesecake filling. The fruit adds a burst of acidity that balances the chocolate, and the specks of red create a stunning visual contrast when you slice the egg open.
Matcha Magic
Replace half of the chocolate with matcha‑infused white chocolate for a pastel‑green shell. The earthy tea flavor pairs surprisingly well with the tangy cheesecake, delivering a sophisticated twist perfect for a spring brunch.
Nutty Delight
Stir in ¼ cup toasted hazelnuts or pistachios into the filling for a crunchy surprise. The nuts add a buttery richness that complements the smooth chocolate and gives a delightful texture contrast.
Spiced Autumn
Swap the lemon juice for a pinch of cinnamon and a dash of pumpkin spice. This version leans into warm flavors, making it suitable for an early‑fall Easter celebration.
Vegan Velvet
Use vegan cream cheese and coconut‑based condensed milk, and substitute the chocolate with a dairy‑free variety. The result is a plant‑based version that still delivers the same luxurious mouthfeel.
Mini Egg Popovers
Instead of full‑size eggs, use a mini muffin tin to create bite‑size chocolate‑cheesecake popovers. Perfect for cocktail parties where guests can pop a few in one hand while mingling.
Storing and Bringing It Back to Life
Fridge Storage
Place the finished eggs in an airtight container and store them in the refrigerator for up to 5 days. The chocolate shell stays firm, and the cheesecake filling remains creamy. If you notice any condensation, pat the eggs dry with a paper towel before resealing.
Freezer Friendly
Wrap each egg individually in plastic wrap, then place them in a freezer‑safe bag. They’ll keep for up to 2 months. To thaw, move them to the fridge overnight, then let them sit at room temperature for 15 minutes before serving.
Best Reheating Method
When you’re ready to serve, gently warm the eggs on a low oven rack (about 150°F/65°C) for 5‑7 minutes. Add a tiny splash of water (about a teaspoon) to the tray; the steam will revive the chocolate’s sheen without melting the filling.